Getting Started
Welcome to the Chia Cloud Wallet, a new platform for interacting with the Chia blockchain. Assets are stored in vaults, in an app that is always synced with the blockchain.
This guide will show you how to create your first Cloud Wallet vault in a few easy steps.
- Browse to the Chia Cloud Wallet website for mainnet.
Use the testnet instance for testing the cloud wallet with txch.
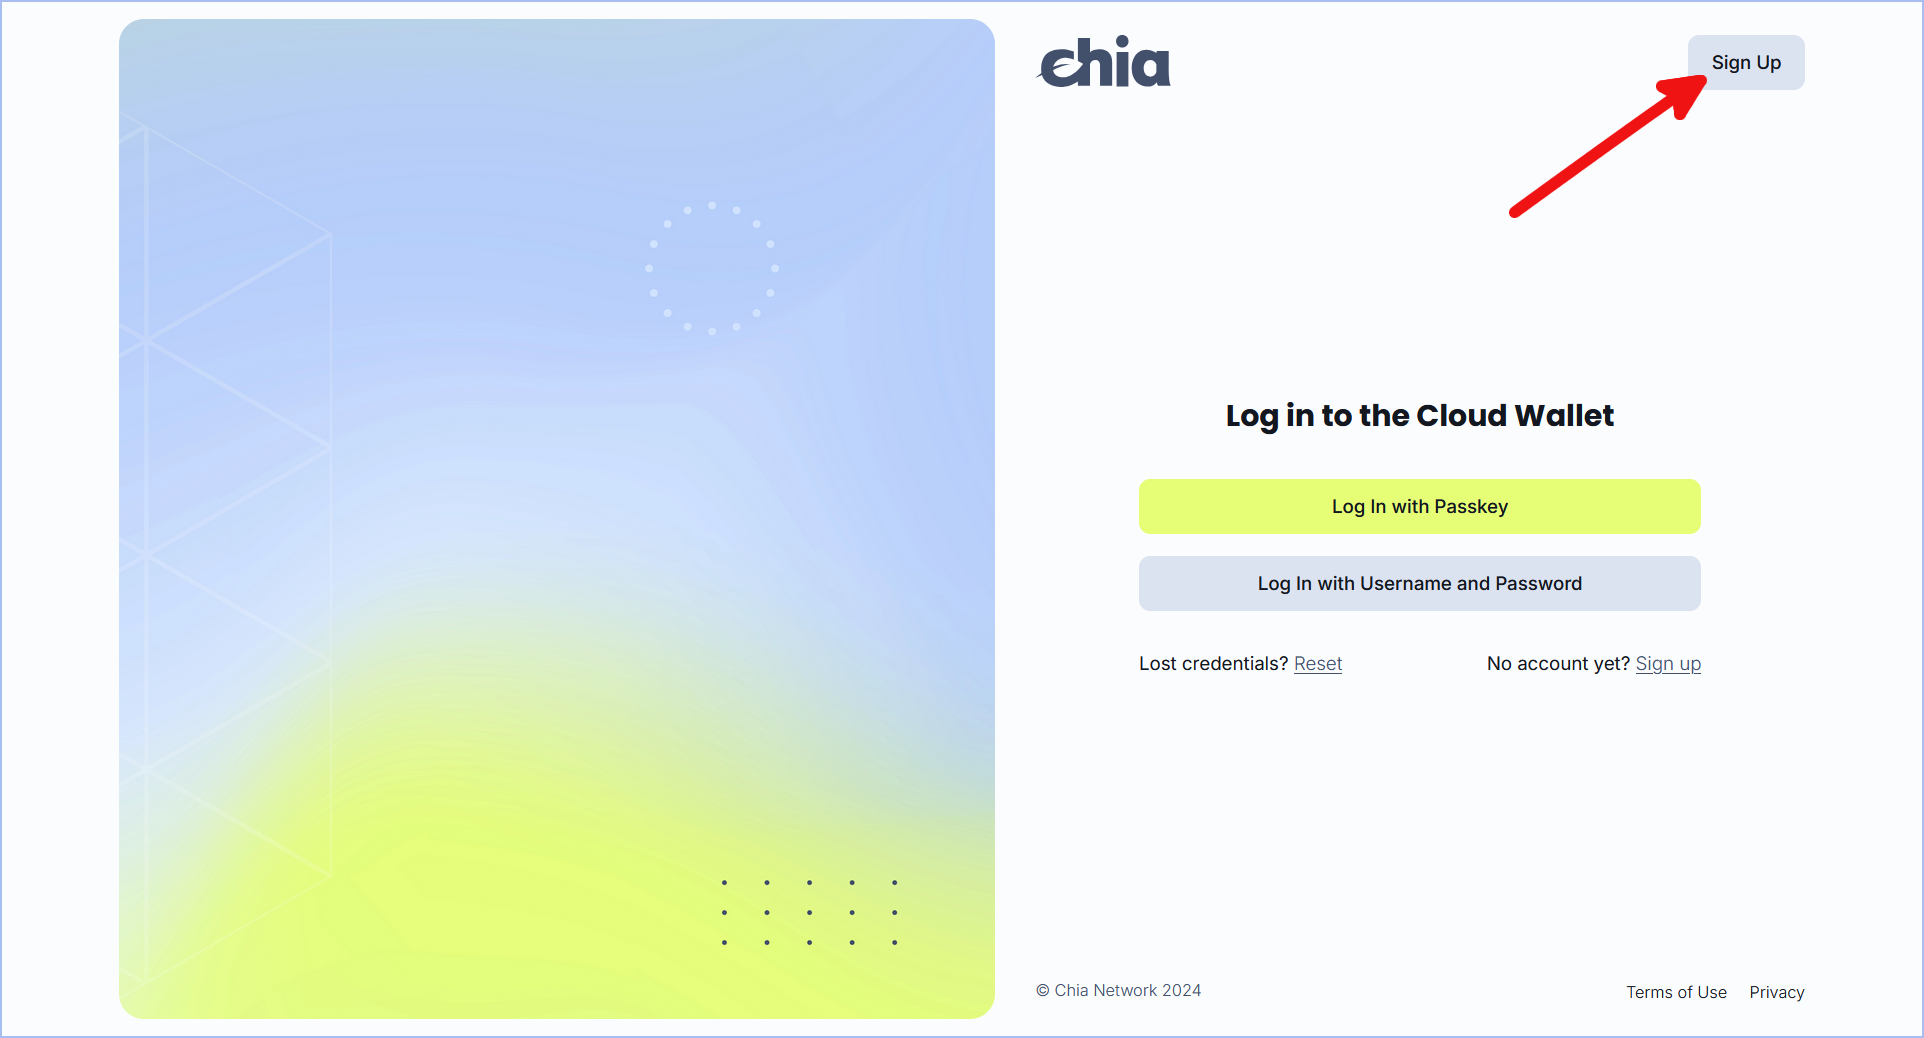
- Click the
Sign Upbutton:
-
Enter your email address and click
Continue. -
Within a few minutes, you should receive an email with the subject "Chia cloud wallet email verification link". Click the link in the email.
-
Enter your name and click
Set new Passkey:
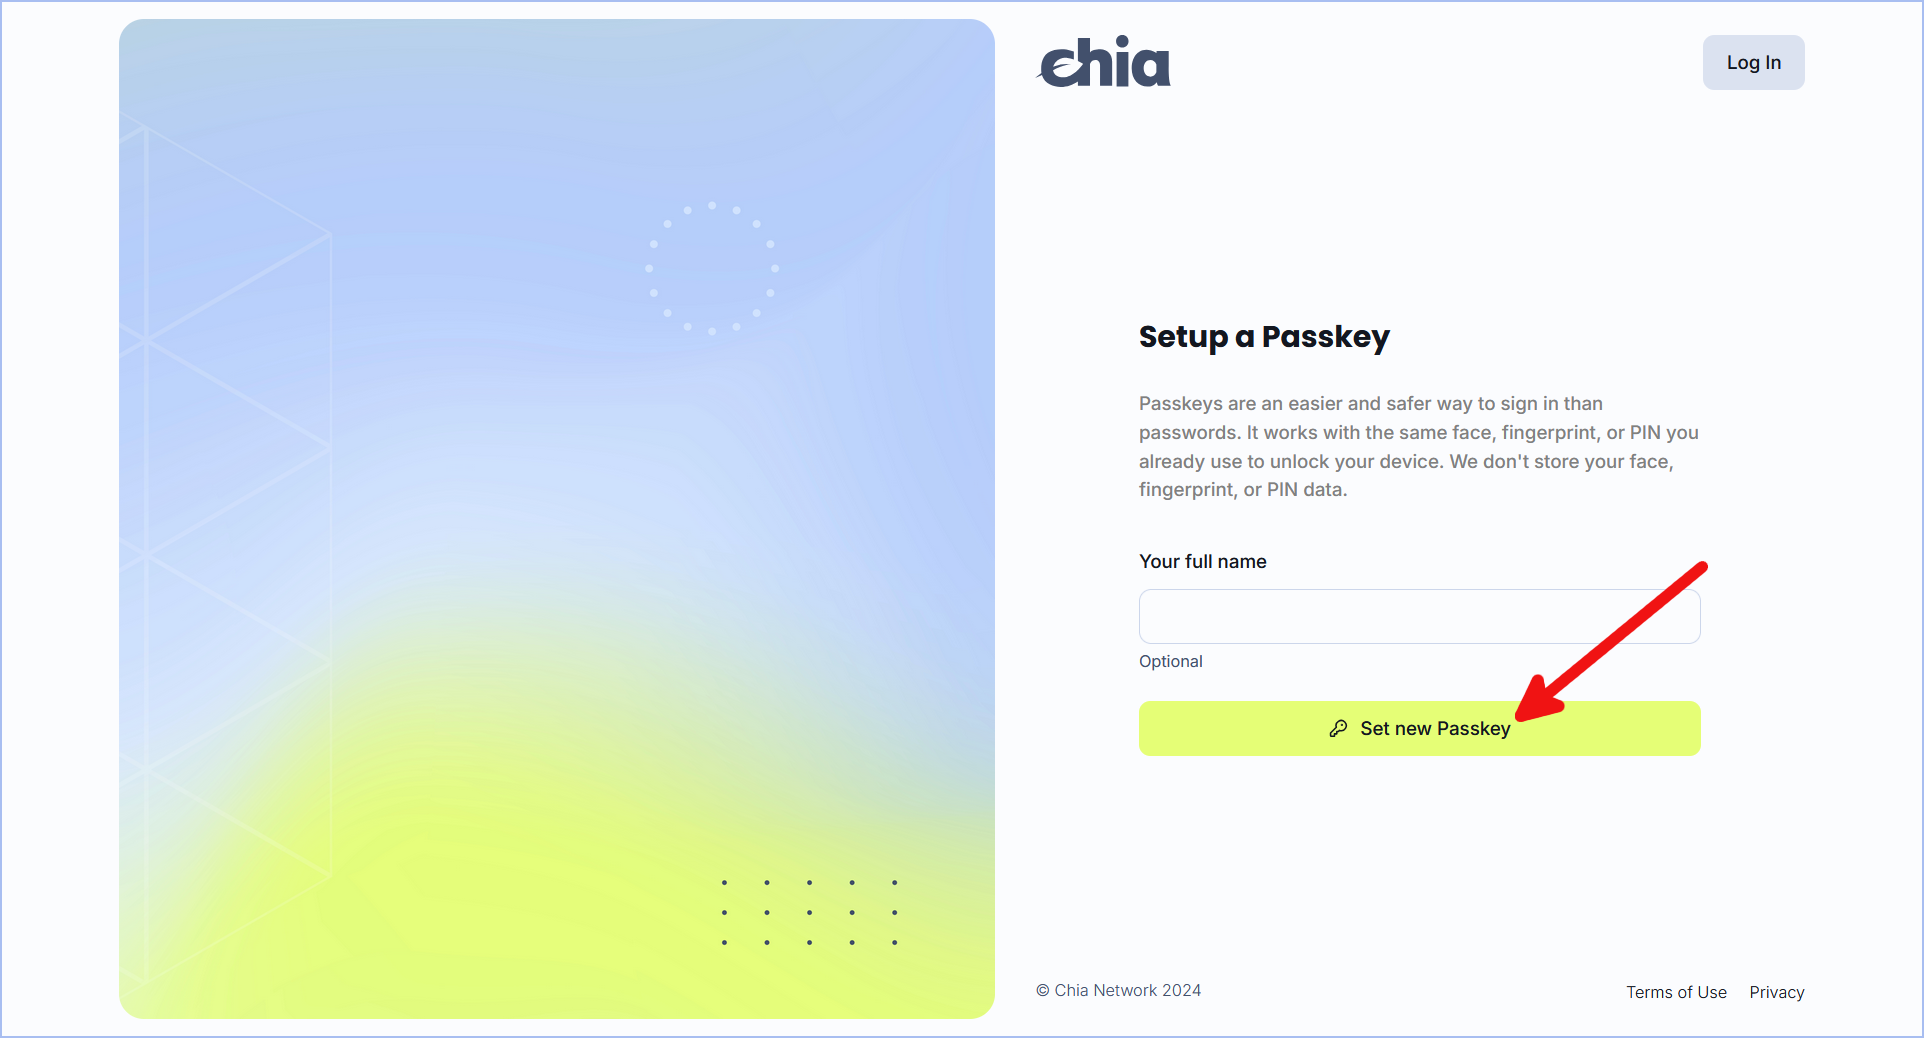
- You will be given a variety of options for adding a new passkey, for example in a hardware key, a password manager, or the OS keychain. This passkey will be your primary method for signing into the Cloud Wallet. It can also be used for signing Chia transactions.
Congratulations, you're all set to create your first vault!
Create a vault
Currently, in order to use the Chia Signer app, you will need two separate devices:
- A computer or phone to access your vault
- An iOS device on which the Chia Signer app is installed
You cannot use both the Cloud Wallet and the Chia Signer app on the same device yet. However, we do intend to enable this functionality in a future release.
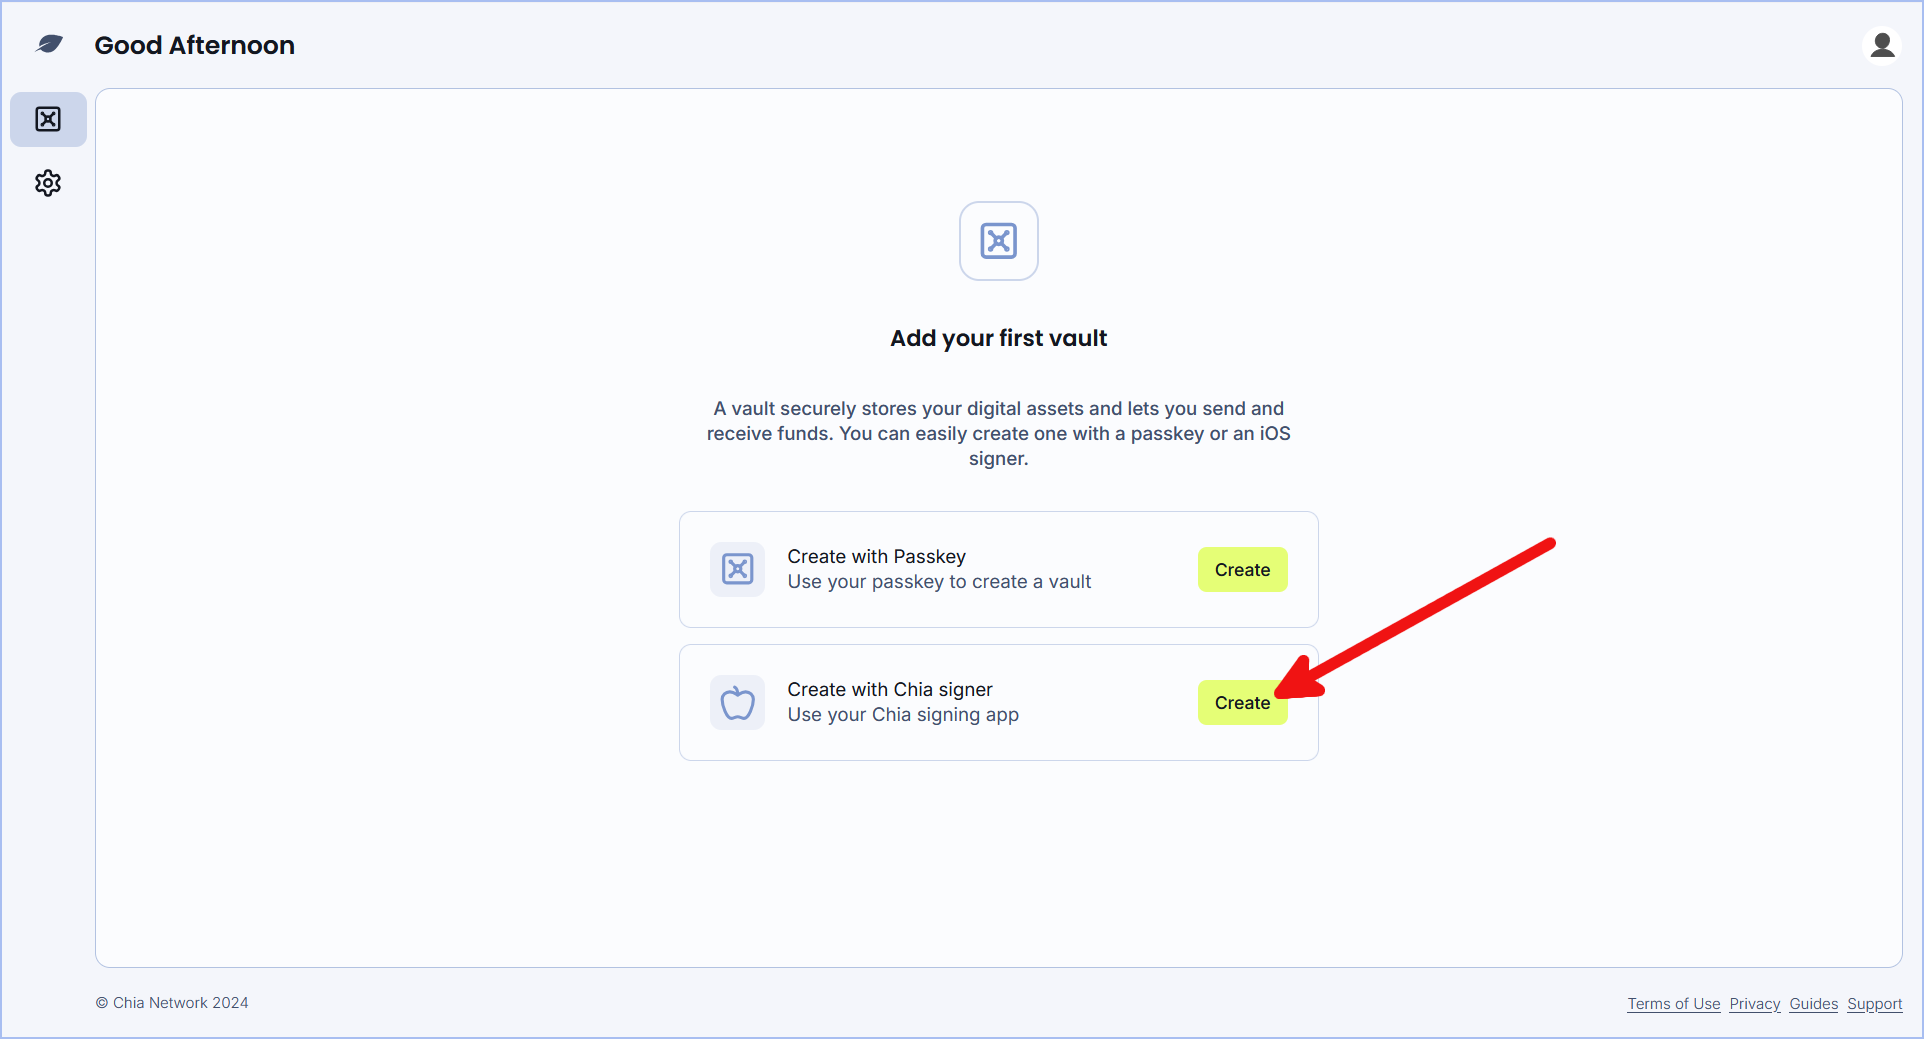
- The free tier of the Cloud Wallet only allows you to create a single vault, so you will need to choose from one of the two options. Let's create a vault using the Chia Signer app:
-
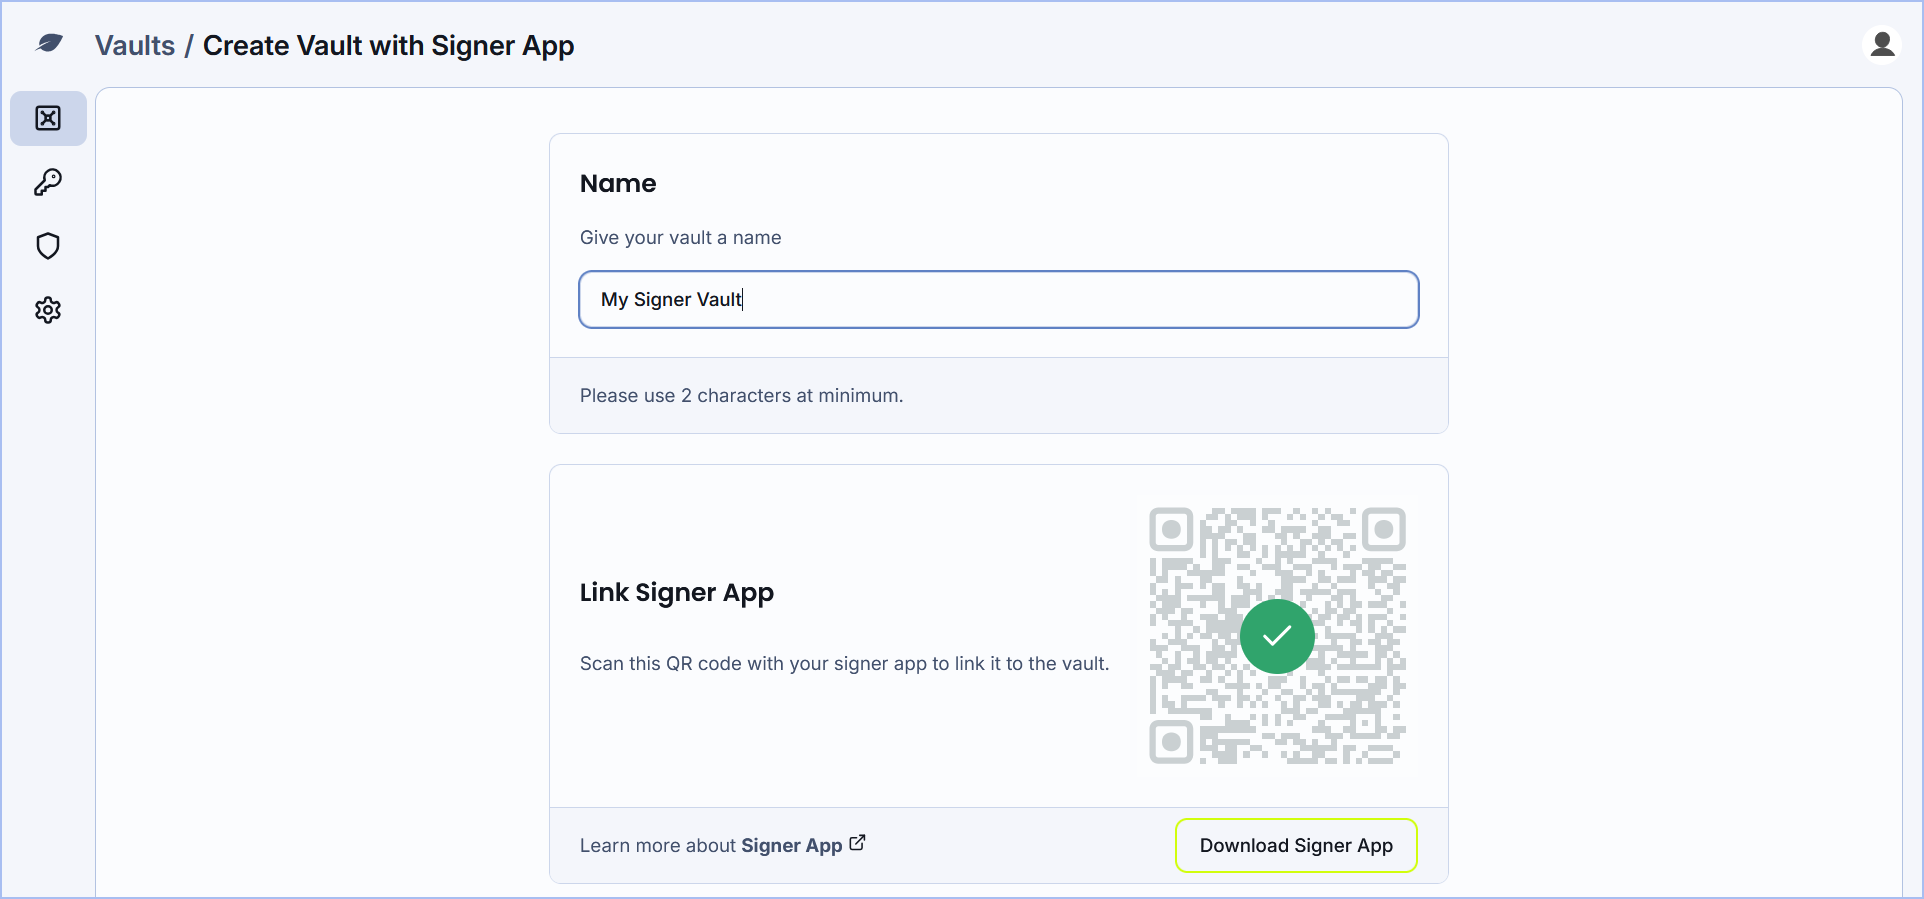
Give your vault a name, for example
My Signer Vault. -
You will need to scan the QR code using your Chia Signer app. If you don't have the app yet, you can download it from the iOS App Store.
Note: The Chia Signer app currently is only built for iOS devices. We will build an Android version of the app in the future.
-
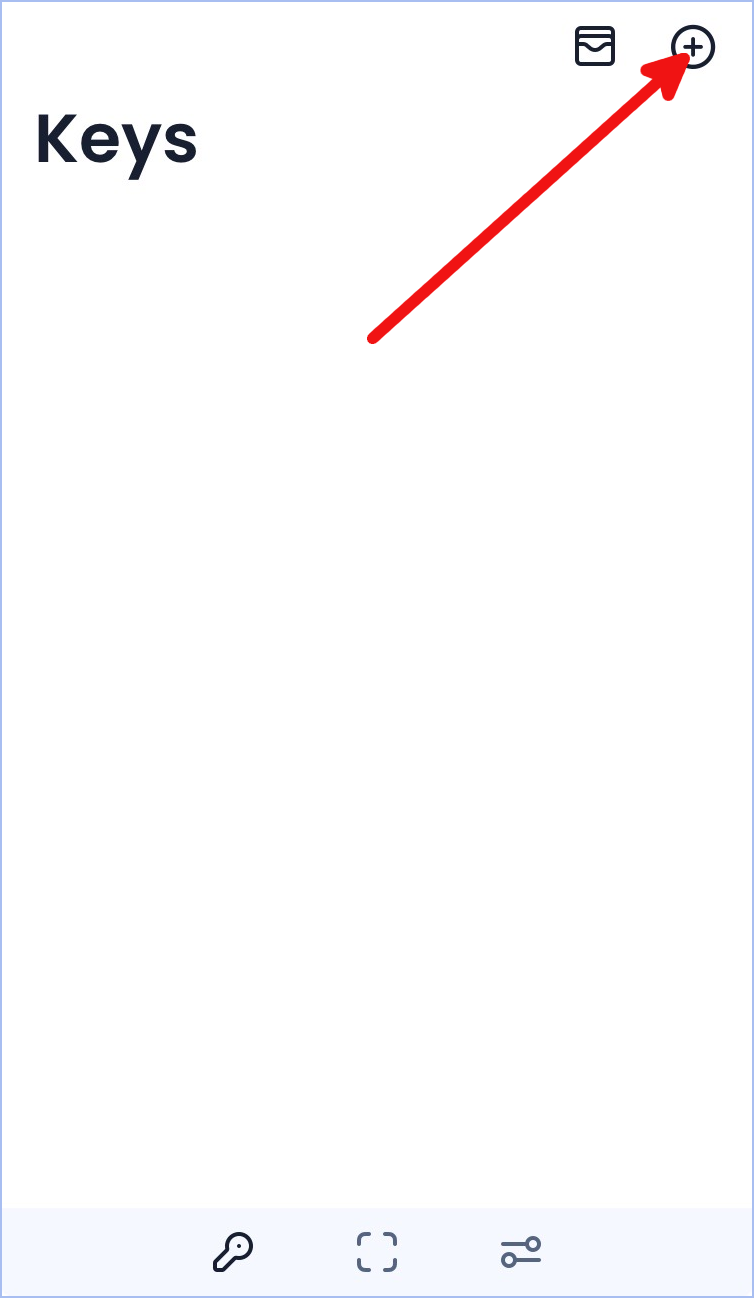
From the Chia Signer app, tap the
+button in the upper-right corner to add a new key:
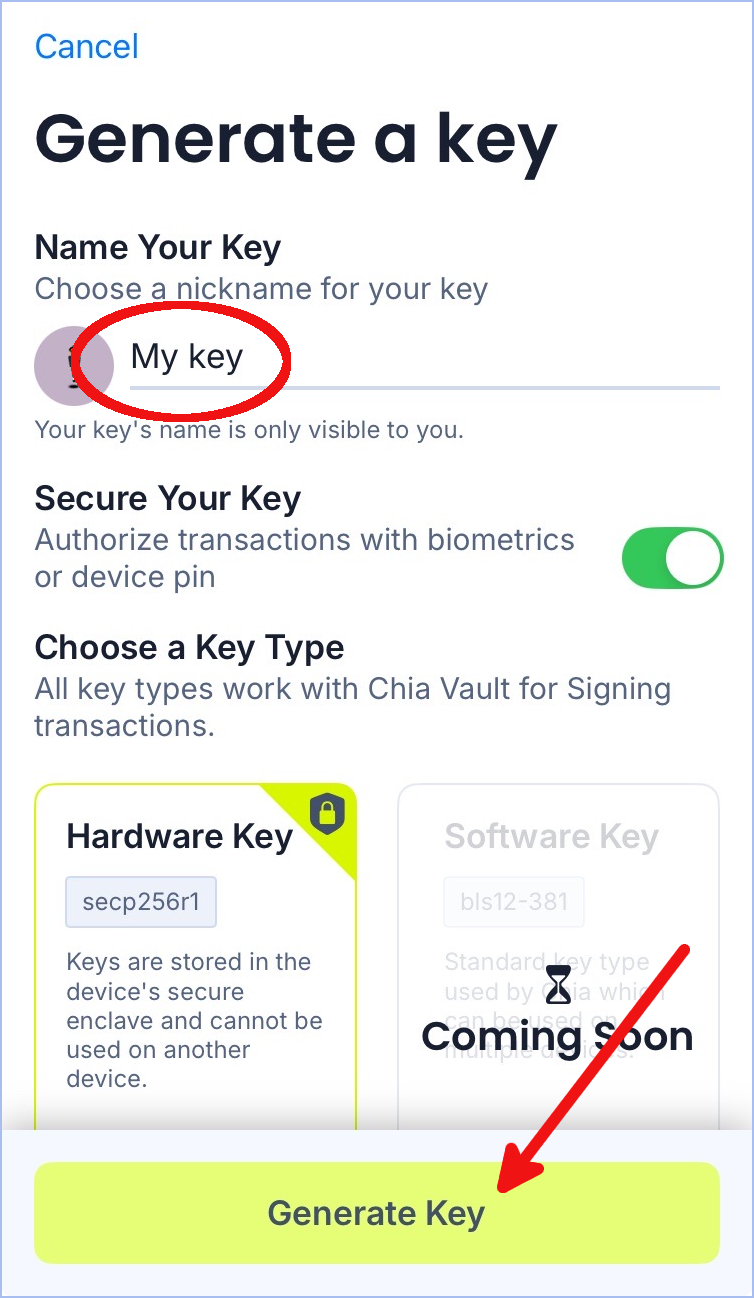
- Give your new key a name, for example
My Key. Currently, the only option is to create a hardware key directly in your device's Secure Enclave. TapGenerate Key:
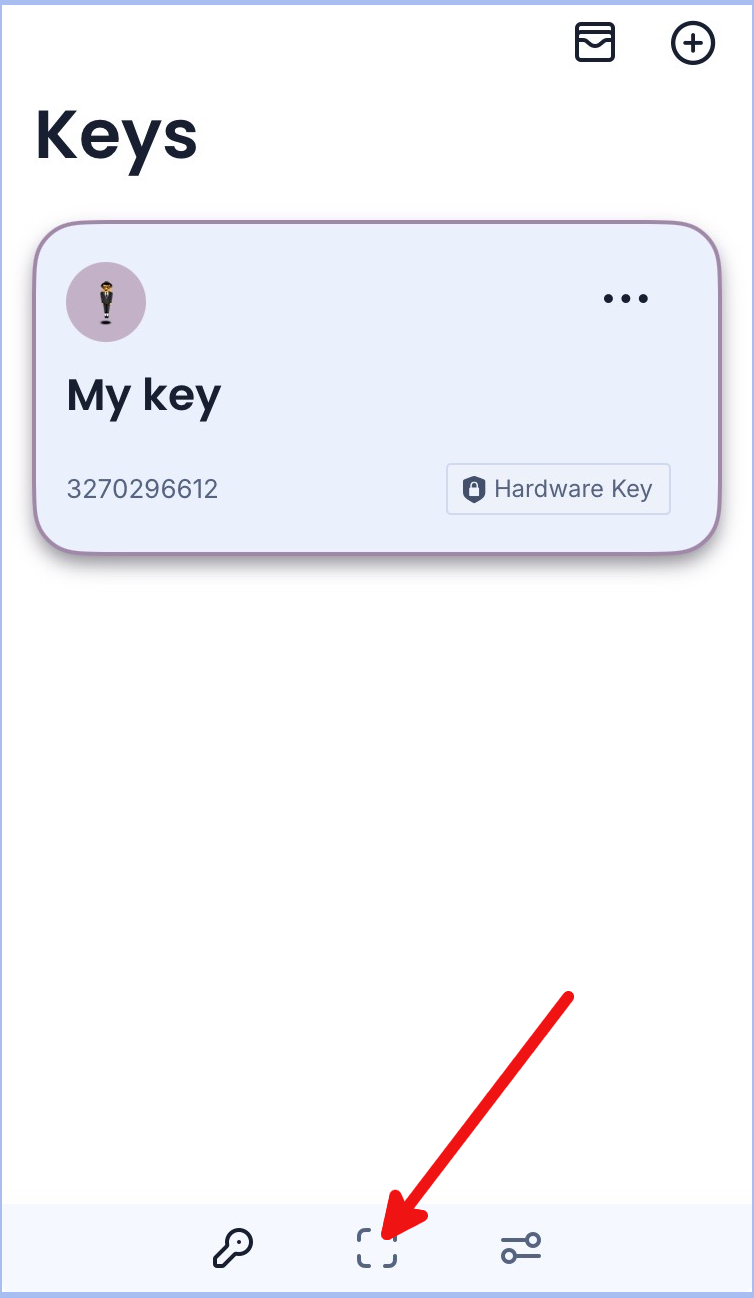
- Your new key will show up in the app's main screen. Tap the button in the lower-middle part of the app and scan the QR code:
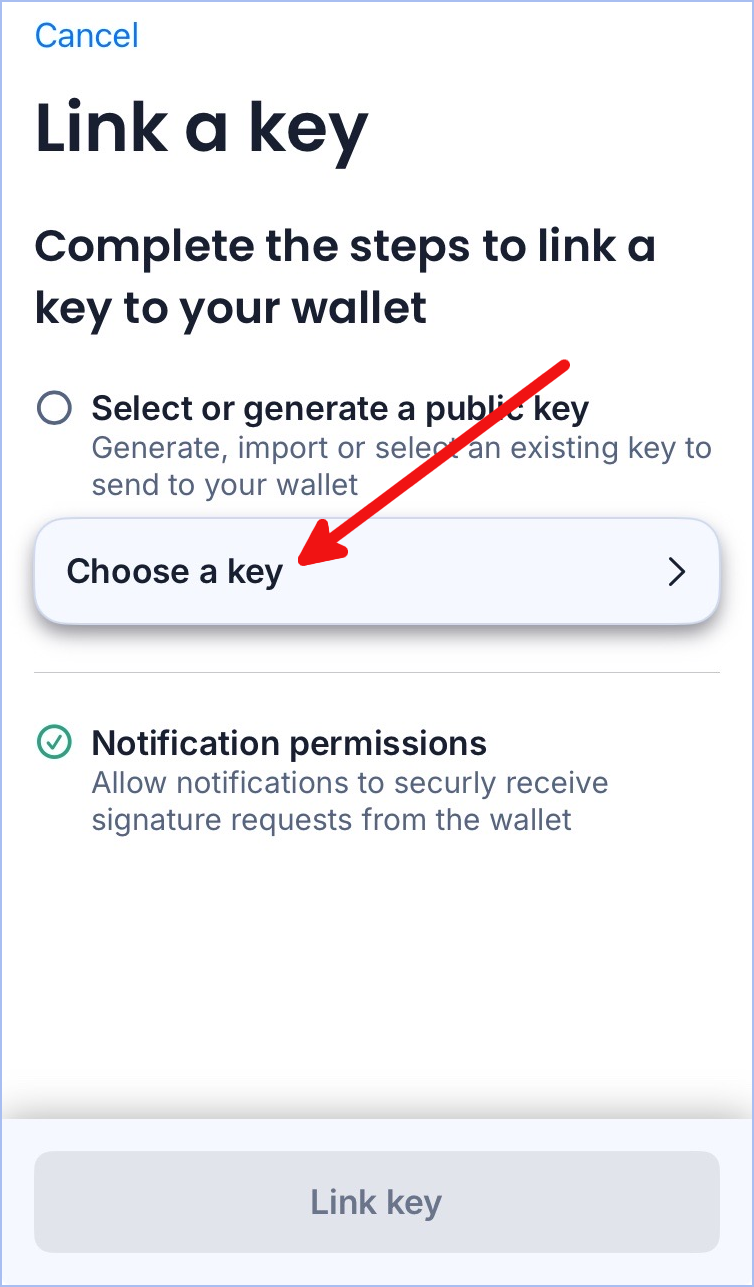
- Tap
Choose a key:
- Tap your new key:
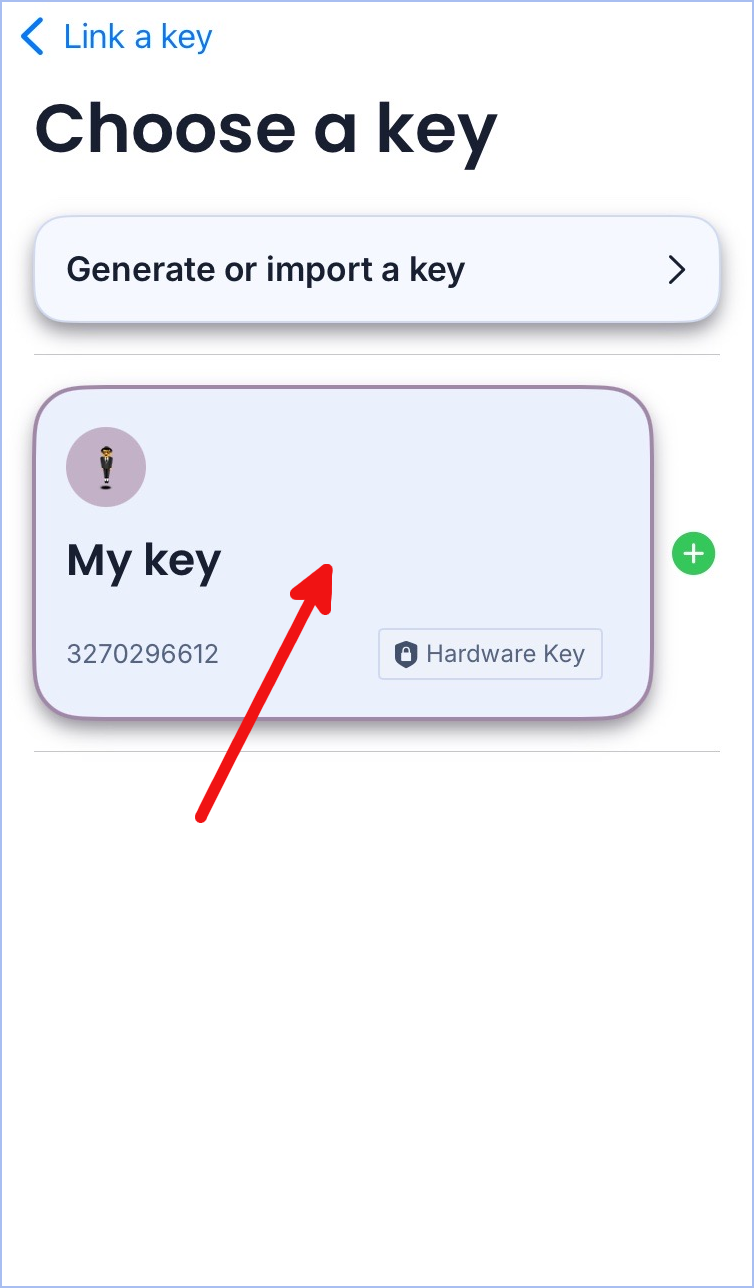
- Tap the
Link keybutton:
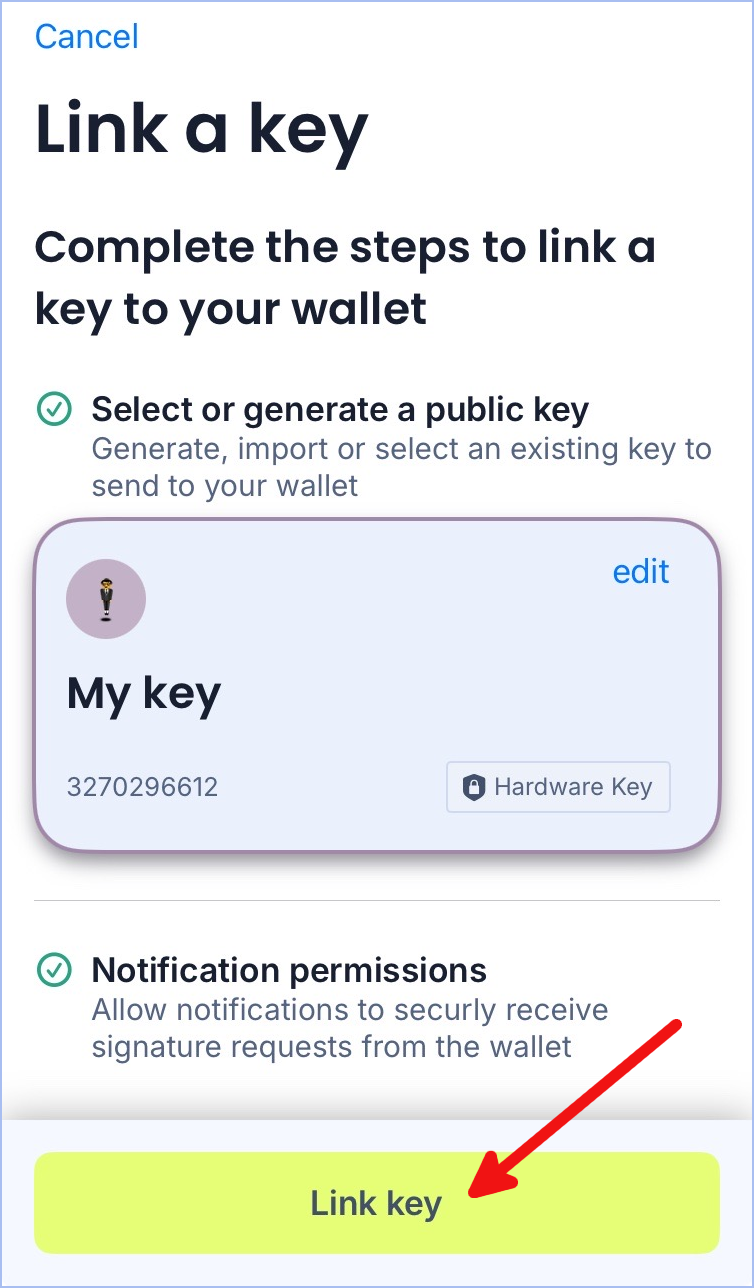
- If a green check box appears over the QR code, then your signer app was successfully linked to your vault:
-
Next, copy the 24 words to a safe location. You will need to recall these words in order to recover your vault, so don't lose them.
-
You can also set a custom time for your vault's recovery clawback. This is the amount of time you will need to wait in order to recover your vault. If your 24-word recovery phrase is stolen, then you will have this long to cancel the recovery.
-
Click the
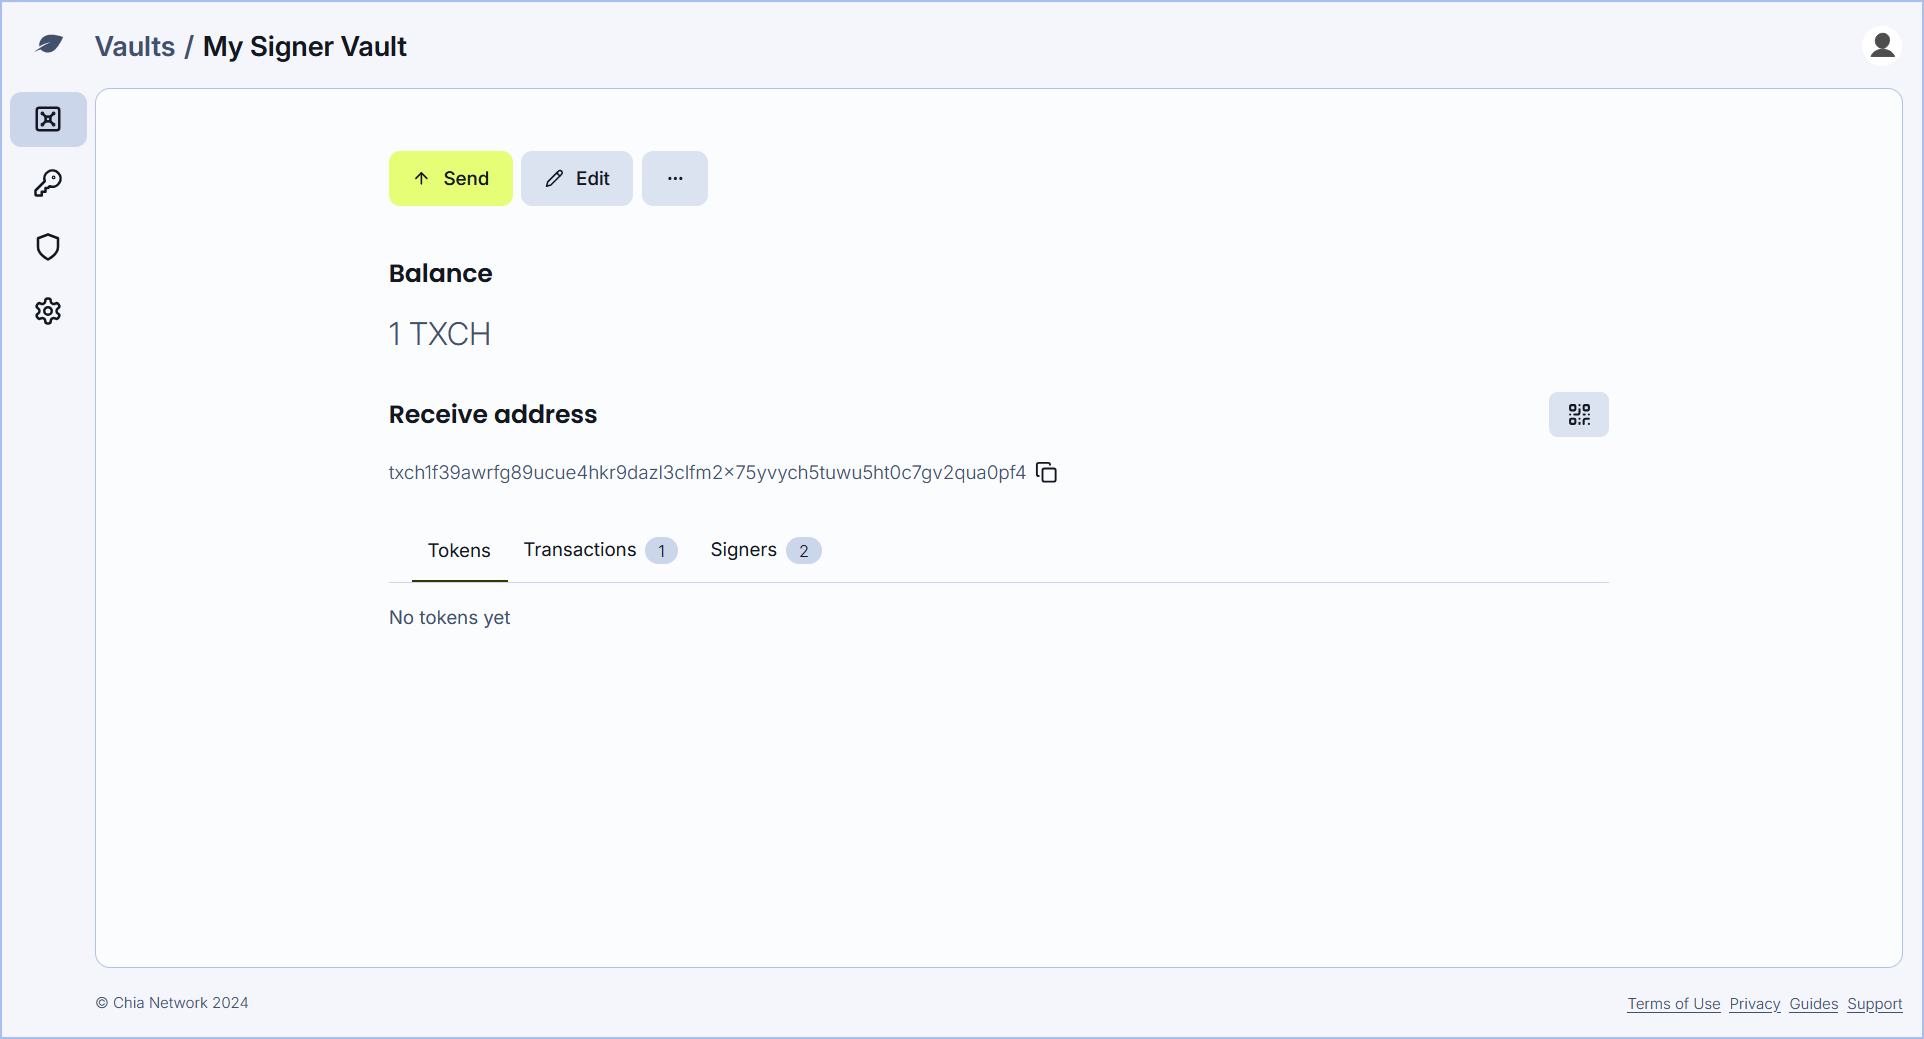
Createbutton to create your vault. A "vault faucet" will mint a new vault for you. Your vault's receive address will appear after this process is complete (typically a minute or two).
You are now ready to receive funds in your new vault.
If using the testnet instance of the chia cloud wallet, Testnet11 uses a test currency called TXCH. To obtain some TXCH, you can visit either our official faucet site or a community-run faucet, and enter your vault's address. You should receive some funds for testing within a few minutes.
Sending funds
Your vault uses the Chia Signer app to sign transactions. Click the Send button to begin the process of sending funds.
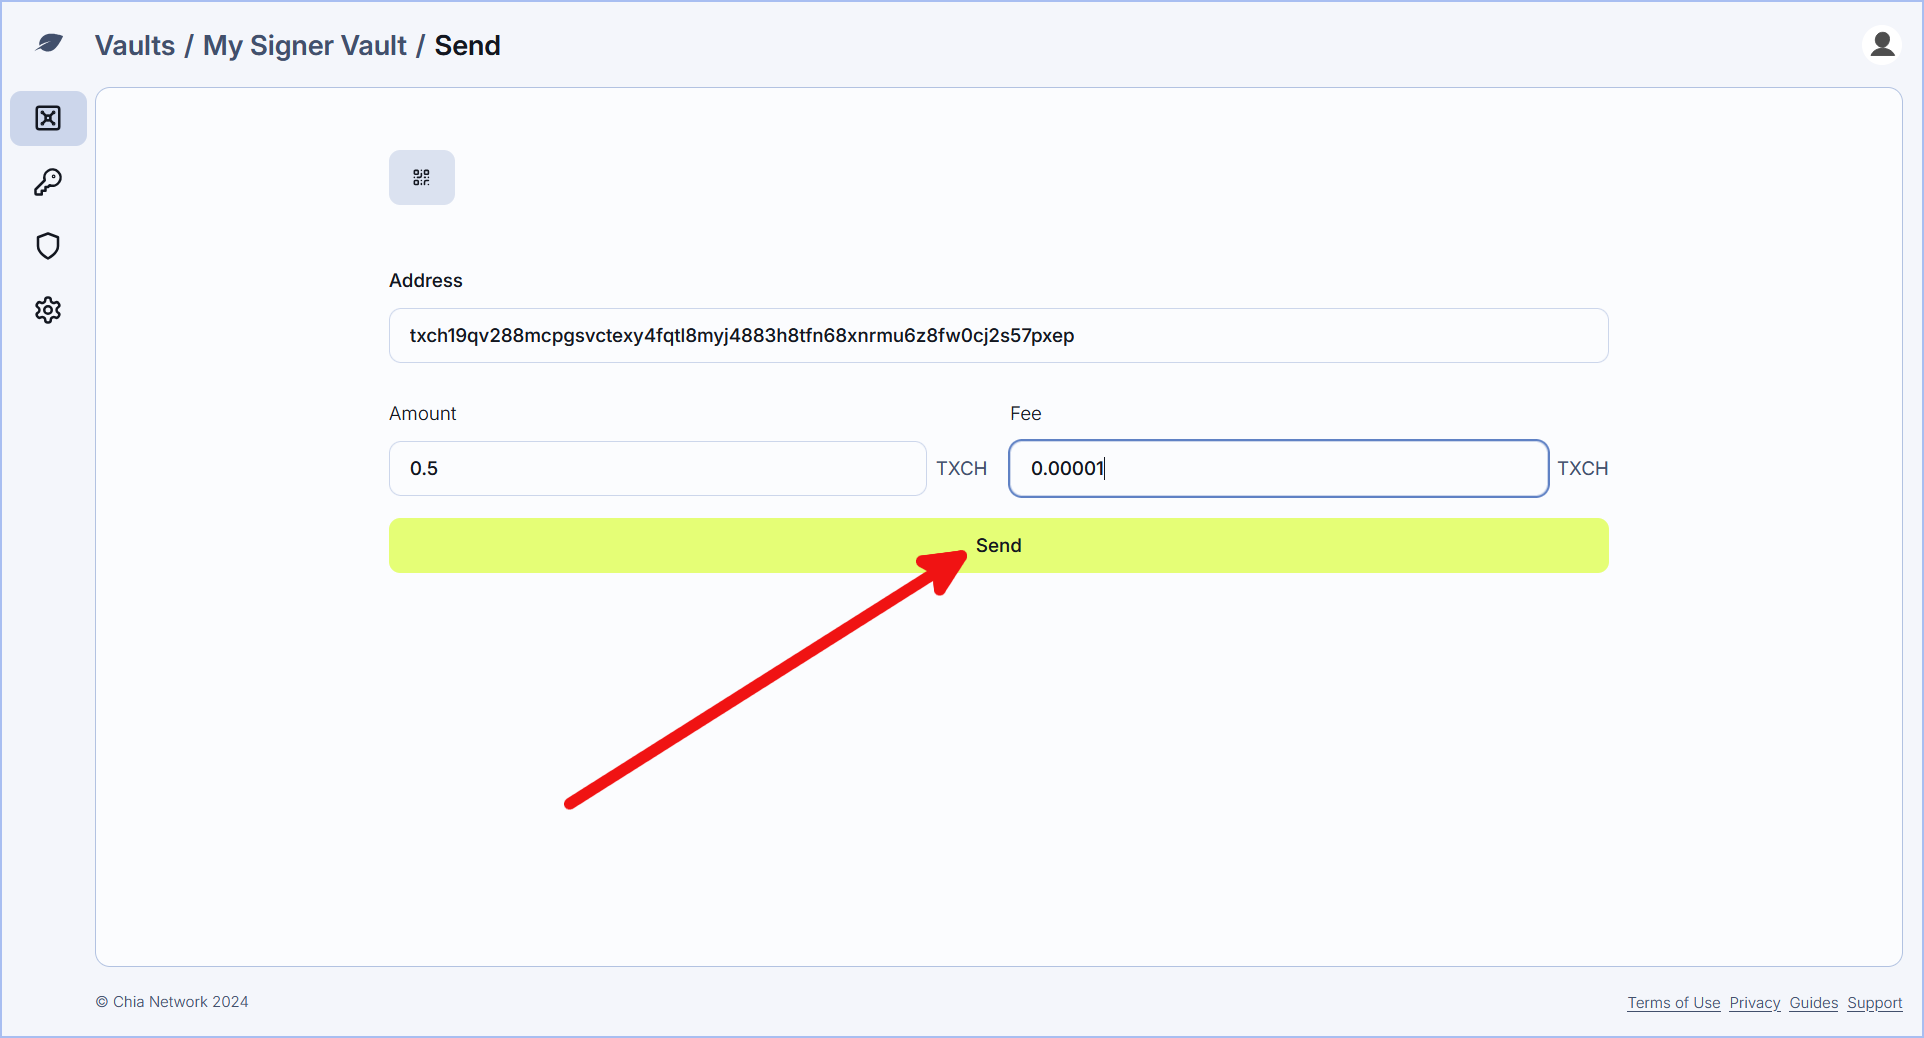
- Enter a destination address, amount to send, and an optional blockchain fee, then click
Send:
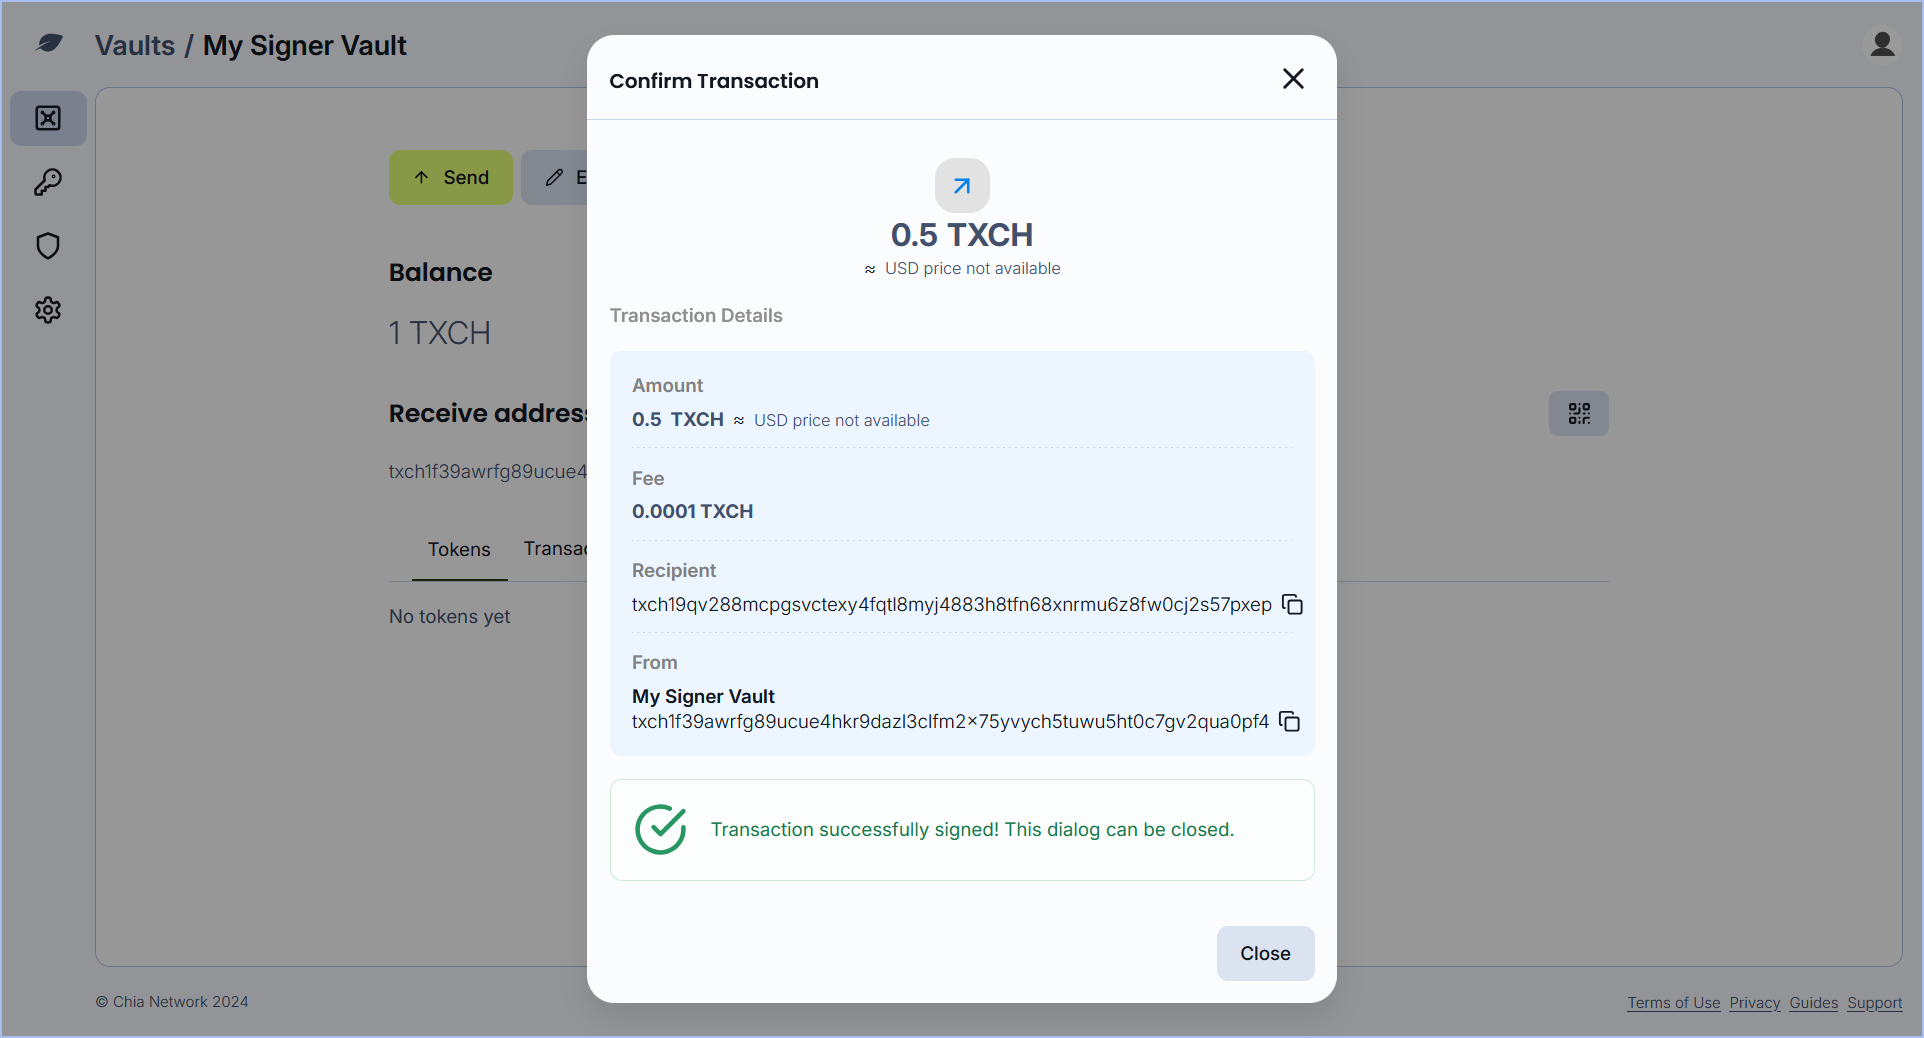
- You will be shown the details of the transaction:
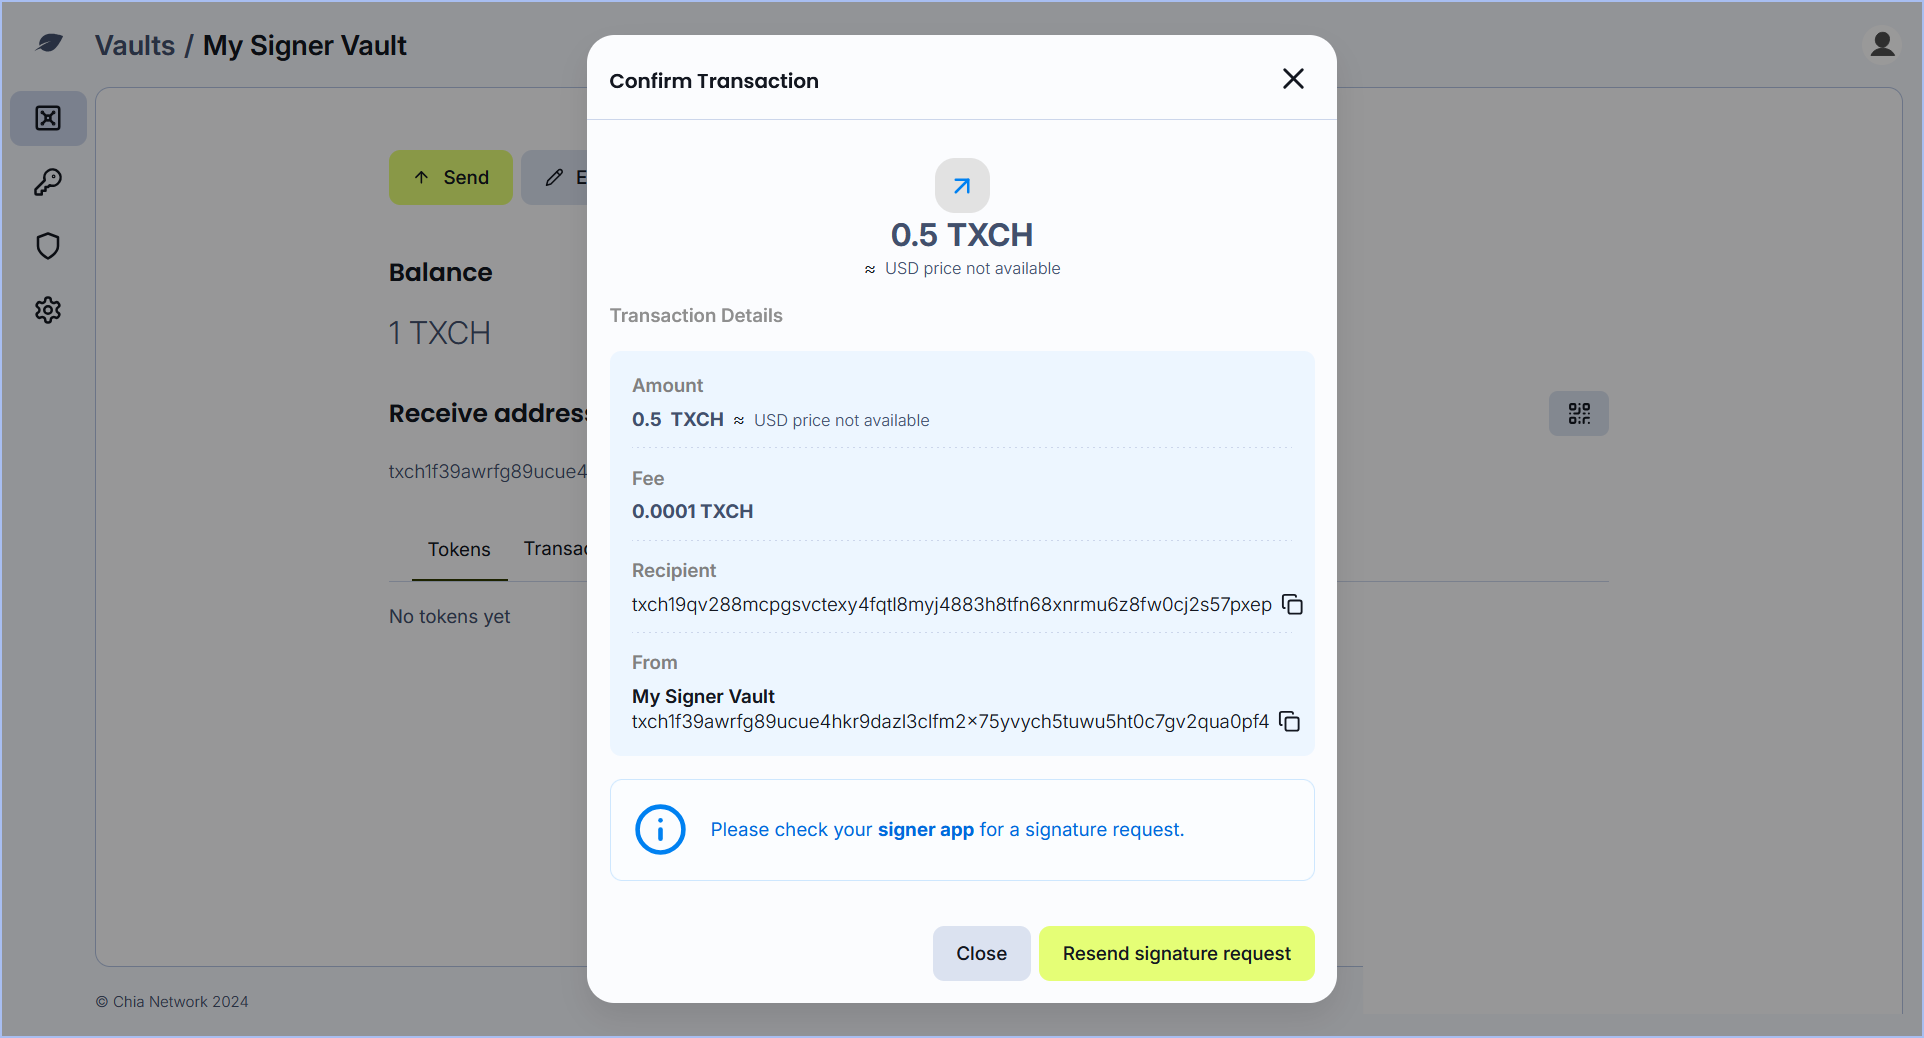
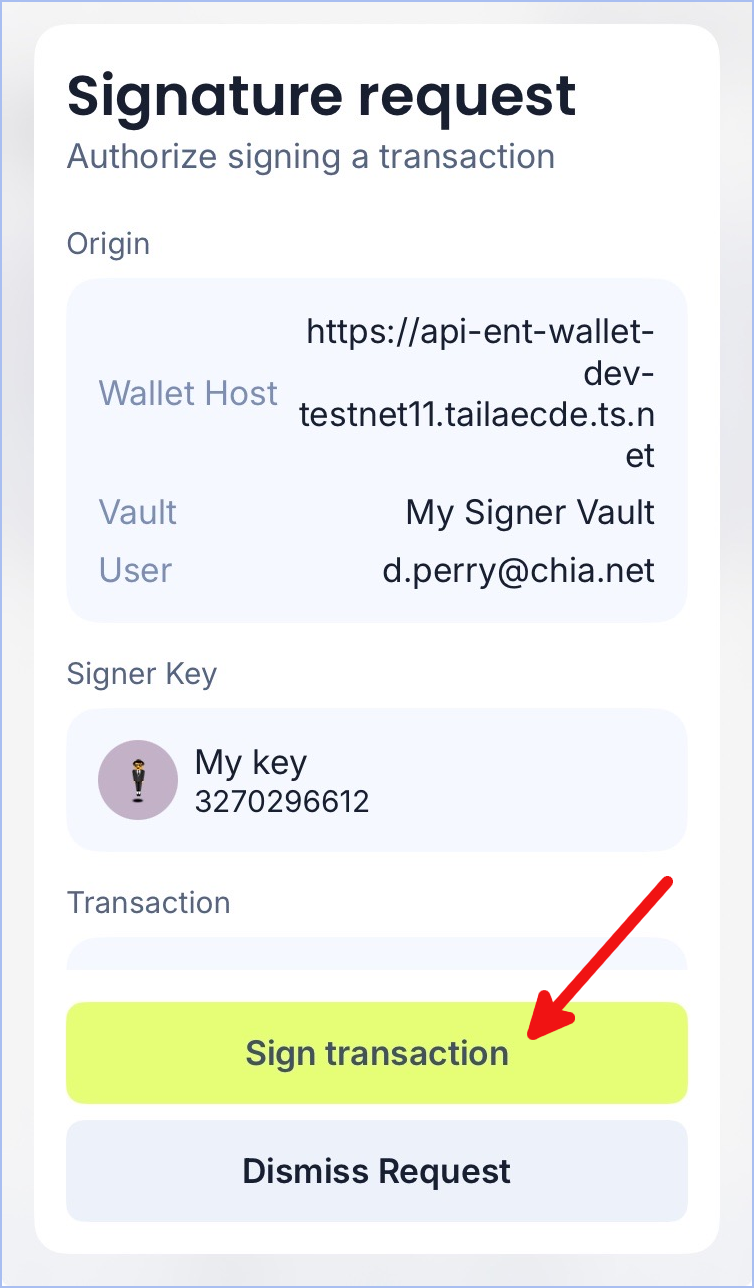
- Simultaneously, your device with the Chia Signer app should receive a push notification with a signature request. This notification will contain the details of the transaction. Scroll through this request to ensure that everything matches what you see from the Cloud Wallet, and tap
Sign transaction:
- You should see a "success" message on both the Chia Signer app and the Cloud Wallet: