How To Plot
To create plots, you must have:
- A farmer public key -- created upon creating a new wallet
- A pool public key -- created upon creating a new wallet
- A pool contract address -- created upon creating a new plot NFT
This page will give a basic overview of how to obtain these values. For a detailed description, see the Beginner's Guide to Farming.
If you already have a wallet with a plot NFT, feel free to skip to the section for CLI Plotting or GUI Plotting.
Public Keys
CLI
If you do not have a key/wallet, run the following command:
chia keys generate
You will be prompted to add a human-readable name to your wallet. This name is only used locally (it is not stored on the blockchain). If you do not enter a name, a number called a fingerprint will be used instead. It is possible to change this name later.
Example response:
Generating private key
Enter the label you want to assign to this key (Press Enter to skip): Test Wallet
Added private key with public key fingerprint 2225787457
In order to view your farmer public key, run chia keys show, optionally including the -f <fingerprint> flag to show only the info for the key you just generated:
chia keys show
The result will include the farmer public key and the pool public key. Make note of them for the subsequent steps. For example:
Showing all public keys derived from your master seed and private key:

Label: Test Wallet
Fingerprint: 2225787457
Master public key (m): ab895c85aea6e7339f1a021ad14eddfa3f5ef97eb37ccbdf0b30c1c88c593065e9409f7401d409c8efe17b903e7c9be1
Farmer public key (m/12381/8444/0/0): ab9b6fda0bbd7510058559cd3b5ce297de5c009d960862b139104feb49a0fe94faace31075009599943327554574c5fc
Pool public key (m/12381/8444/1/0): 894c772c219a6d05dc7b0a51fe05f891849e1e26283387f249d7074ead5dcff2fe779ee69f4570c60d1970f0fda77eac
First wallet address: xch12kqlkrgq7mkxwt64j5fsge3q84sg007wqyc8egkptyjflmazp7gqd7gh7c
GUI
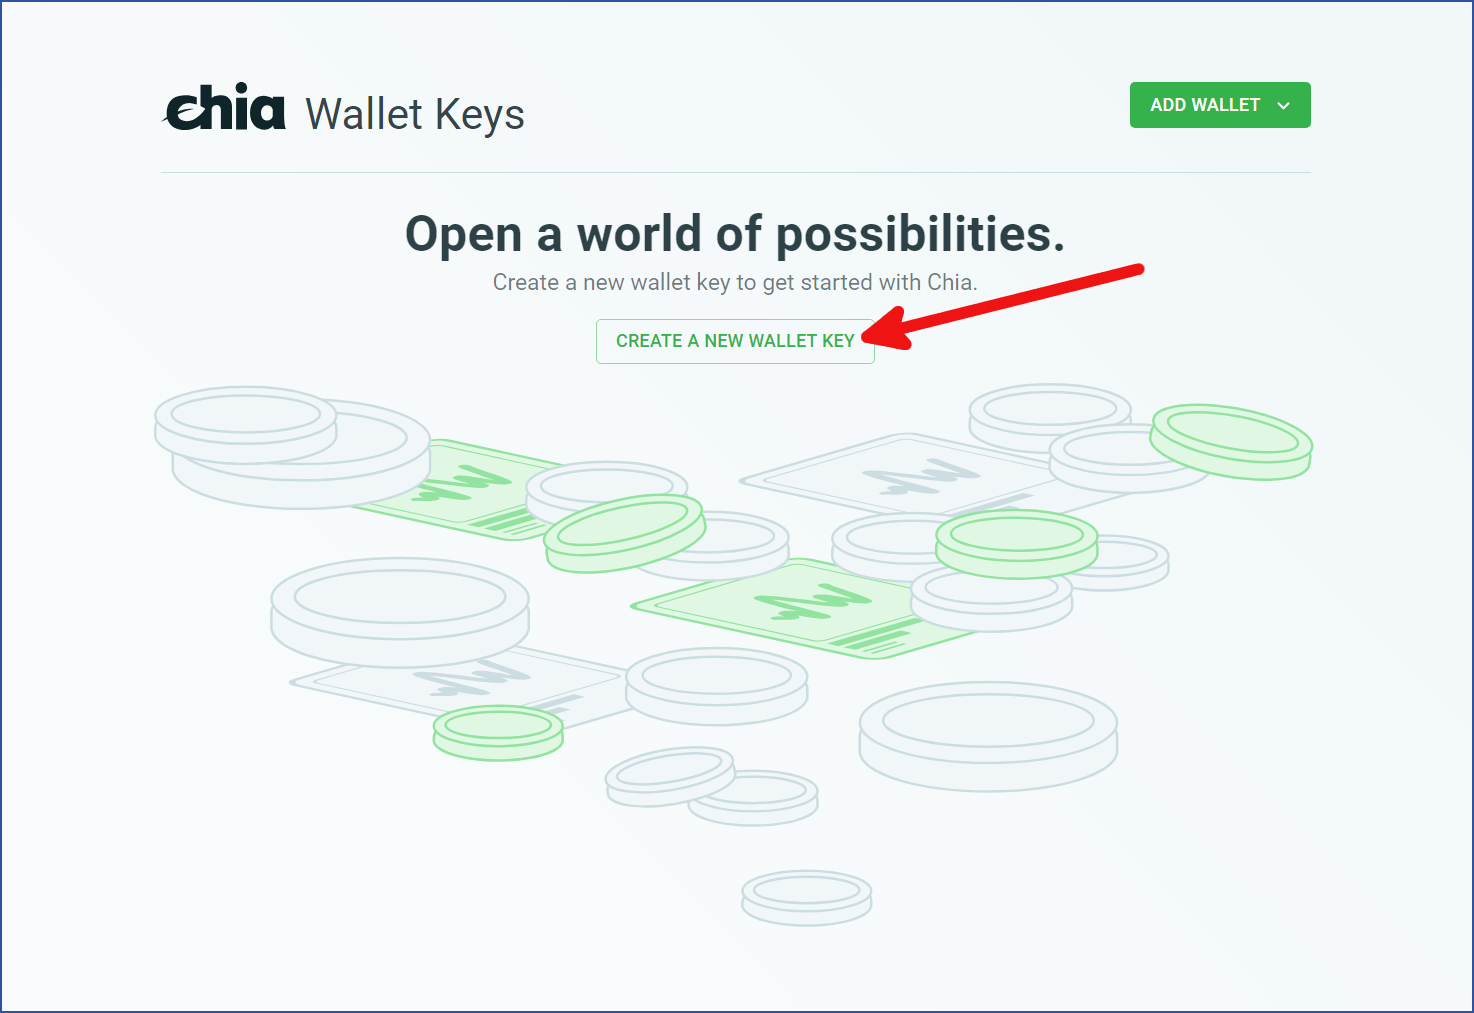
If you do not have a key, you will need to create one:
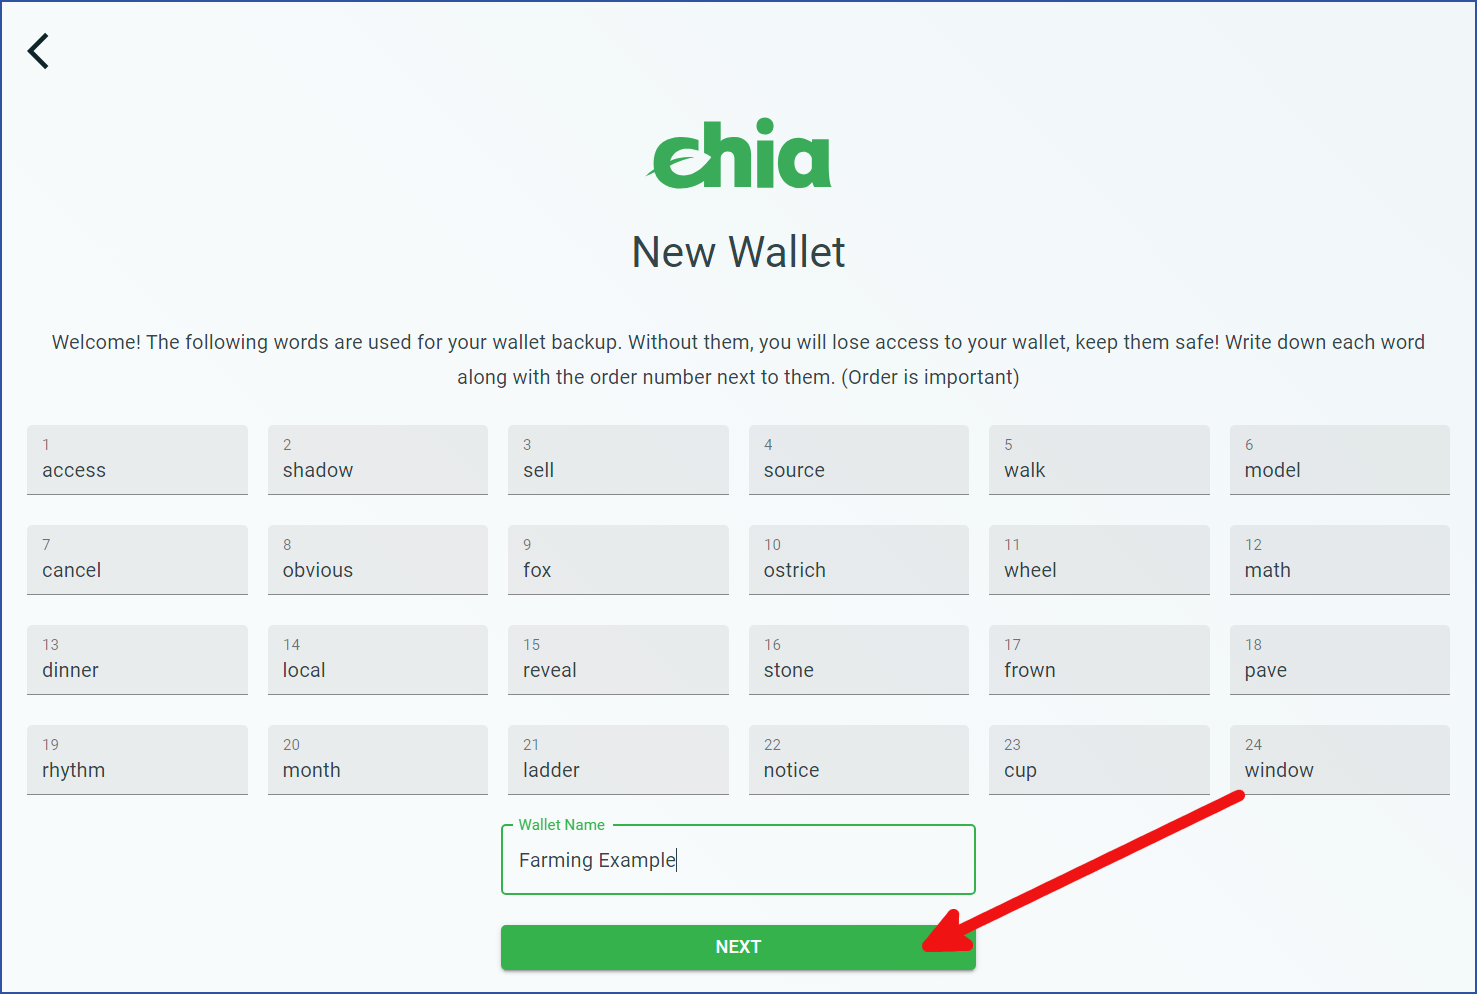
You will be presented with a list of twenty-four words. This is your wallet's recovery phrase. These words are all that are needed to recover your wallet on a new computer. Write them down and store them in a safe place. The order of the words is important.
You can also choose a custom name for your wallet. Click NEXT when you are finished.
If someone obtains a copy of these words, they can steal your entire wallet, including all of its funds. Be sure to store your recovery phrase in a safe place.
You will be taken to your new wallet. In order to obtain your farmer public key, you will need to log out of the wallet. Click the icon next to the bell icon.

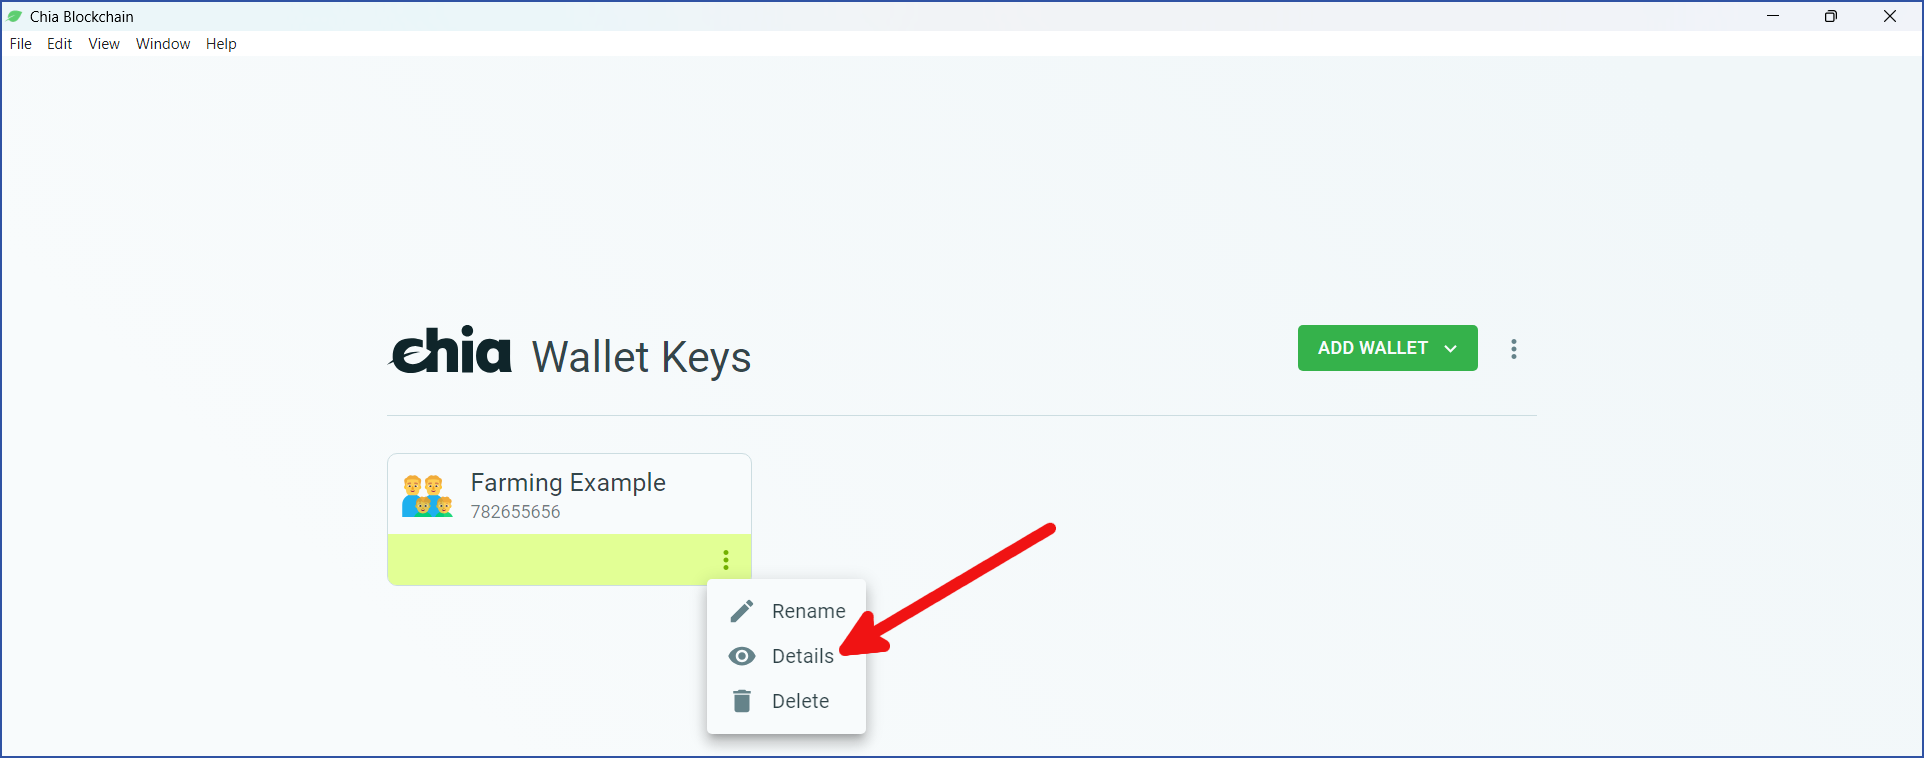
Click the three dots in the lower-right corner of your wallet, then click Details.
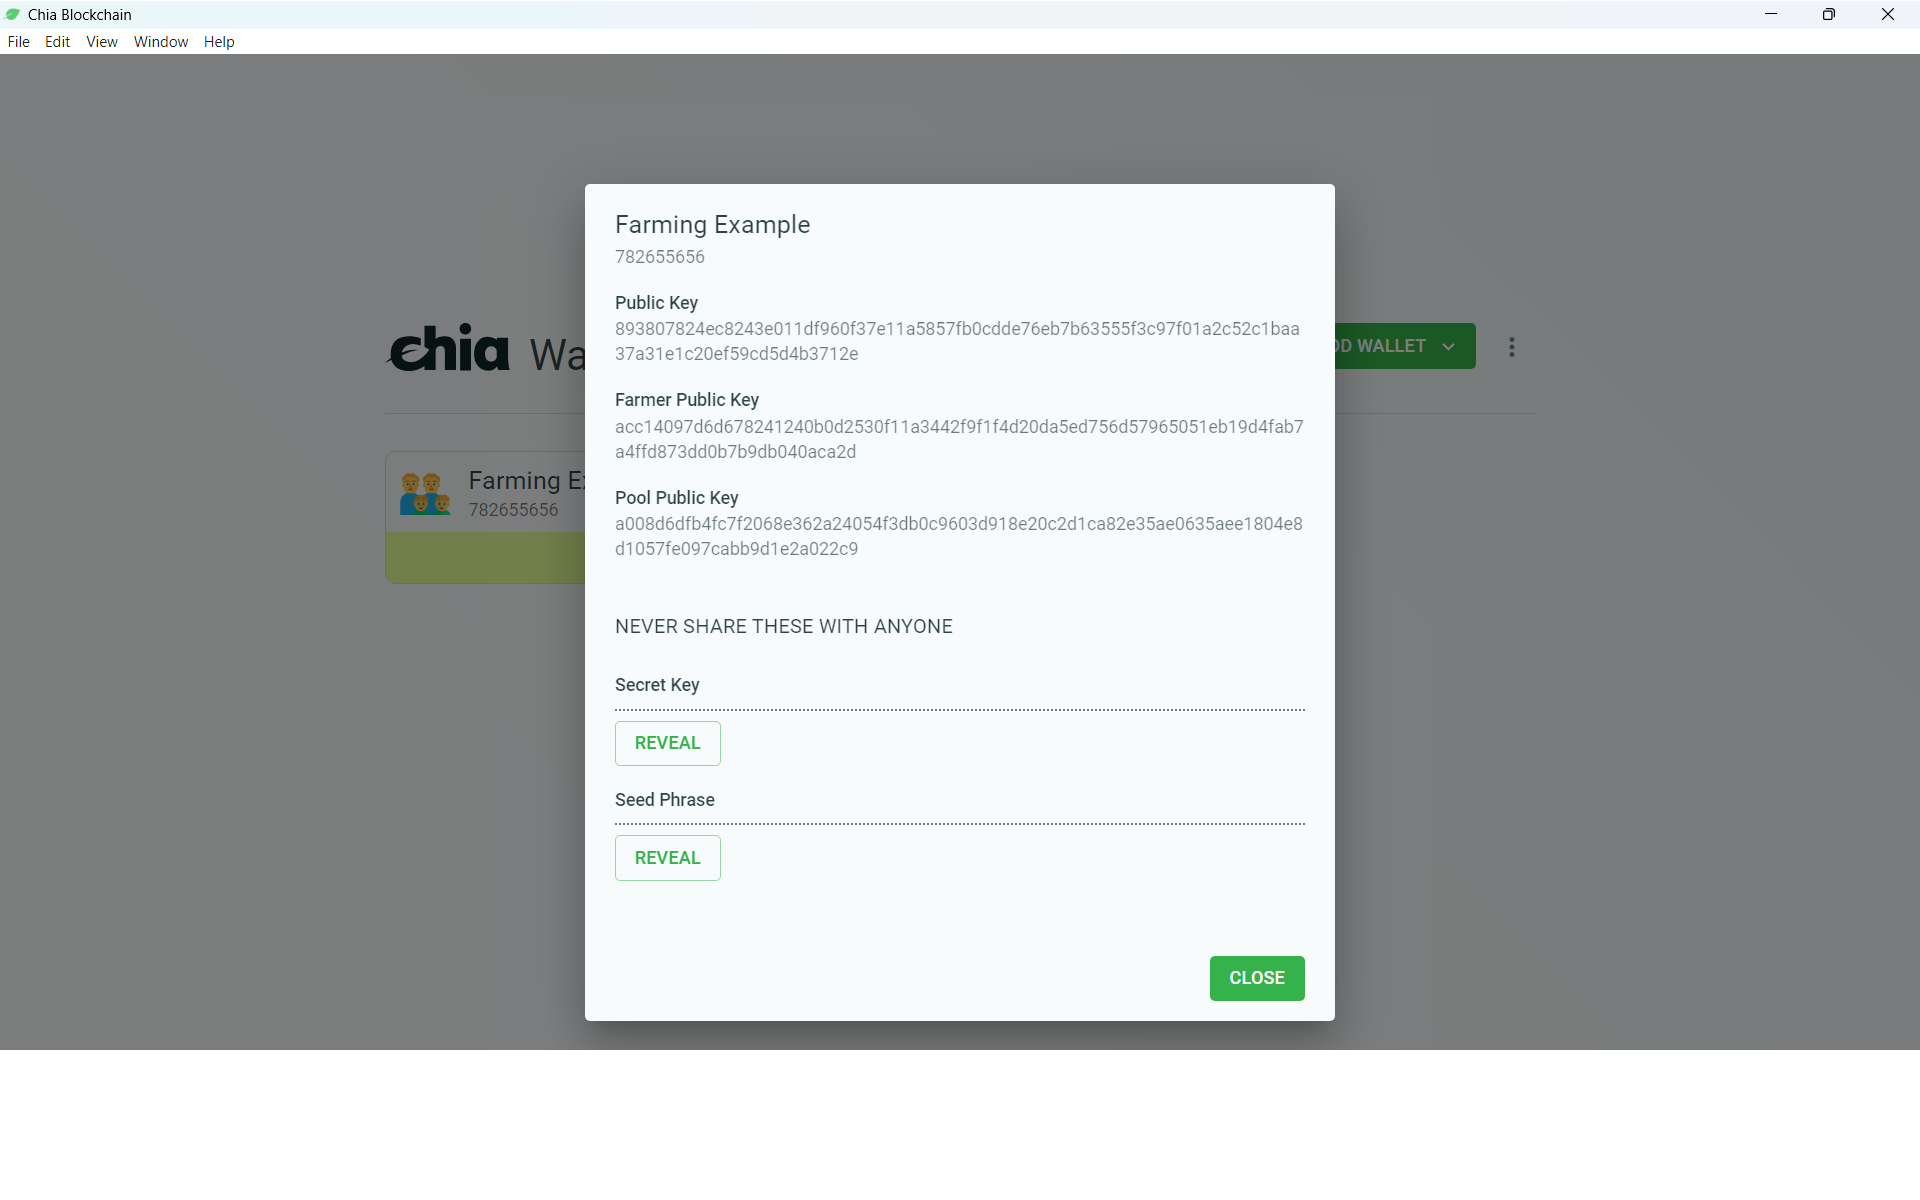
Among other information, your farmer public key and pool public key will be shown. If you plan to plot from the CLI, make note of these keys. If you will stick with the GUI for plotting, these keys will be obtained automatically later.
Pool Contract Address
In order to obtain a pool contract address, you will need to create a Plot NFT.
CLI
First, you will need to decide whether to join a pool. For this example, we will use -s pool to join a pool. If you want to solo farm, use -s local instead. (Later, you can change pools, using the plot NFT you are about to create.)
If you choose to join a pool, you will need to add the URL by adding the -u flag. For this example, we will join OpenChia, but there are many great pools to choose from. For a list of reputable pools, see Chialinks.com. (Chia Network Inc. does not run a pool, and is not affiliated with OpenChia or Chialinks).
Finally, you have the option of adding a blockchain fee with the -m flag. We will add a one-mojo fee for this example, which typically is sufficient to complete your transaction within a few minutes.
In order to run this command, you will need to have one mojo in your wallet for the plot NFT, and one mojo for the blockchain fee.
For example:
chia plotnft create -s pool -u https://pool.openchia.io -m 0.000000000001
Response:
---- Pool parameters fetched from https://pool.openchia.io ----
{'authentication_token_timeout': 5,
 'description': 'A pool you can trust. We embrace open source.',
 'fee': '0.01',
 'logo_url': 'https://www.chia.net/img/chia_logo.svg',
 'minimum_difficulty': 1,
 'name': 'OpenChia.io Pool',
 'protocol_version': 1,
 'relative_lock_height': 32,
 'target_puzzle_hash': '0x55a2d443901f7655893cecf1c98e4152591e8641c64a2b0294cad1a754d02f89'}
----------------------------------------------------------------
Will create a plot NFT and join pool: https://pool.openchia.io.
Transaction submitted to nodes: [{'peer_id': 'b3d9de85d29931c10050b56c7afb91c99141943fc81ff2d1a8425e52be0d08ab', 'inclusion_status': 'SUCCESS', 'error_msg': None}]
Run 'chia wallet get_transaction -f 782655656 -tx 0x7e6f64d1858263378a66869aefee7bb27ffc2bf3cccb3cc1d89a522d24559654' to get status
After the transaction has completed, you can obtain the plot NFT's information by running chia plotnft show. For example:
chia plotnft show
Response:
Current state: FARMING_TO_POOL
Current state from block height: 4099277
Launcher ID: fc64e39395f60398532545d0e3116398e5edcdbeacd140606ec25fa36243bc9c
Target address (not for plotting): xch12k3dgsusram9tzfuancunrjp2fv3apjpce9zkq55etg6w4xs97ysgcrlwh
Number of plots: 0
Owner public key: b571502c188db6ee65cafc9fcc9cfdcb2cff06795687a70bf8d76a48e89adb34b2d28e8d93cabc394e5779a8ae65c38e
Pool contract address (use ONLY for plotting - do not send money to this address): xch1l6tt70hrhewlyvjs37vc5tvw80c89cy8dcxcnynsqatsyf5466aq63f9mq
Current pool URL: https://pool.openchia.io
Current difficulty: 1
Points balance: 0
Points found (24h): 0
Percent Successful Points (24h): 0.00%
Payout instructions (pool will pay to this address): xch16ycs0t3cmn63wysrn8hpg93dgevy3cw9yt3mmx2anrz52dkuj9nsauzyzt
Relative lock height: 32 blocks
The pool contract address is listed in the middle of the output. It will begin with "xch".
GUI
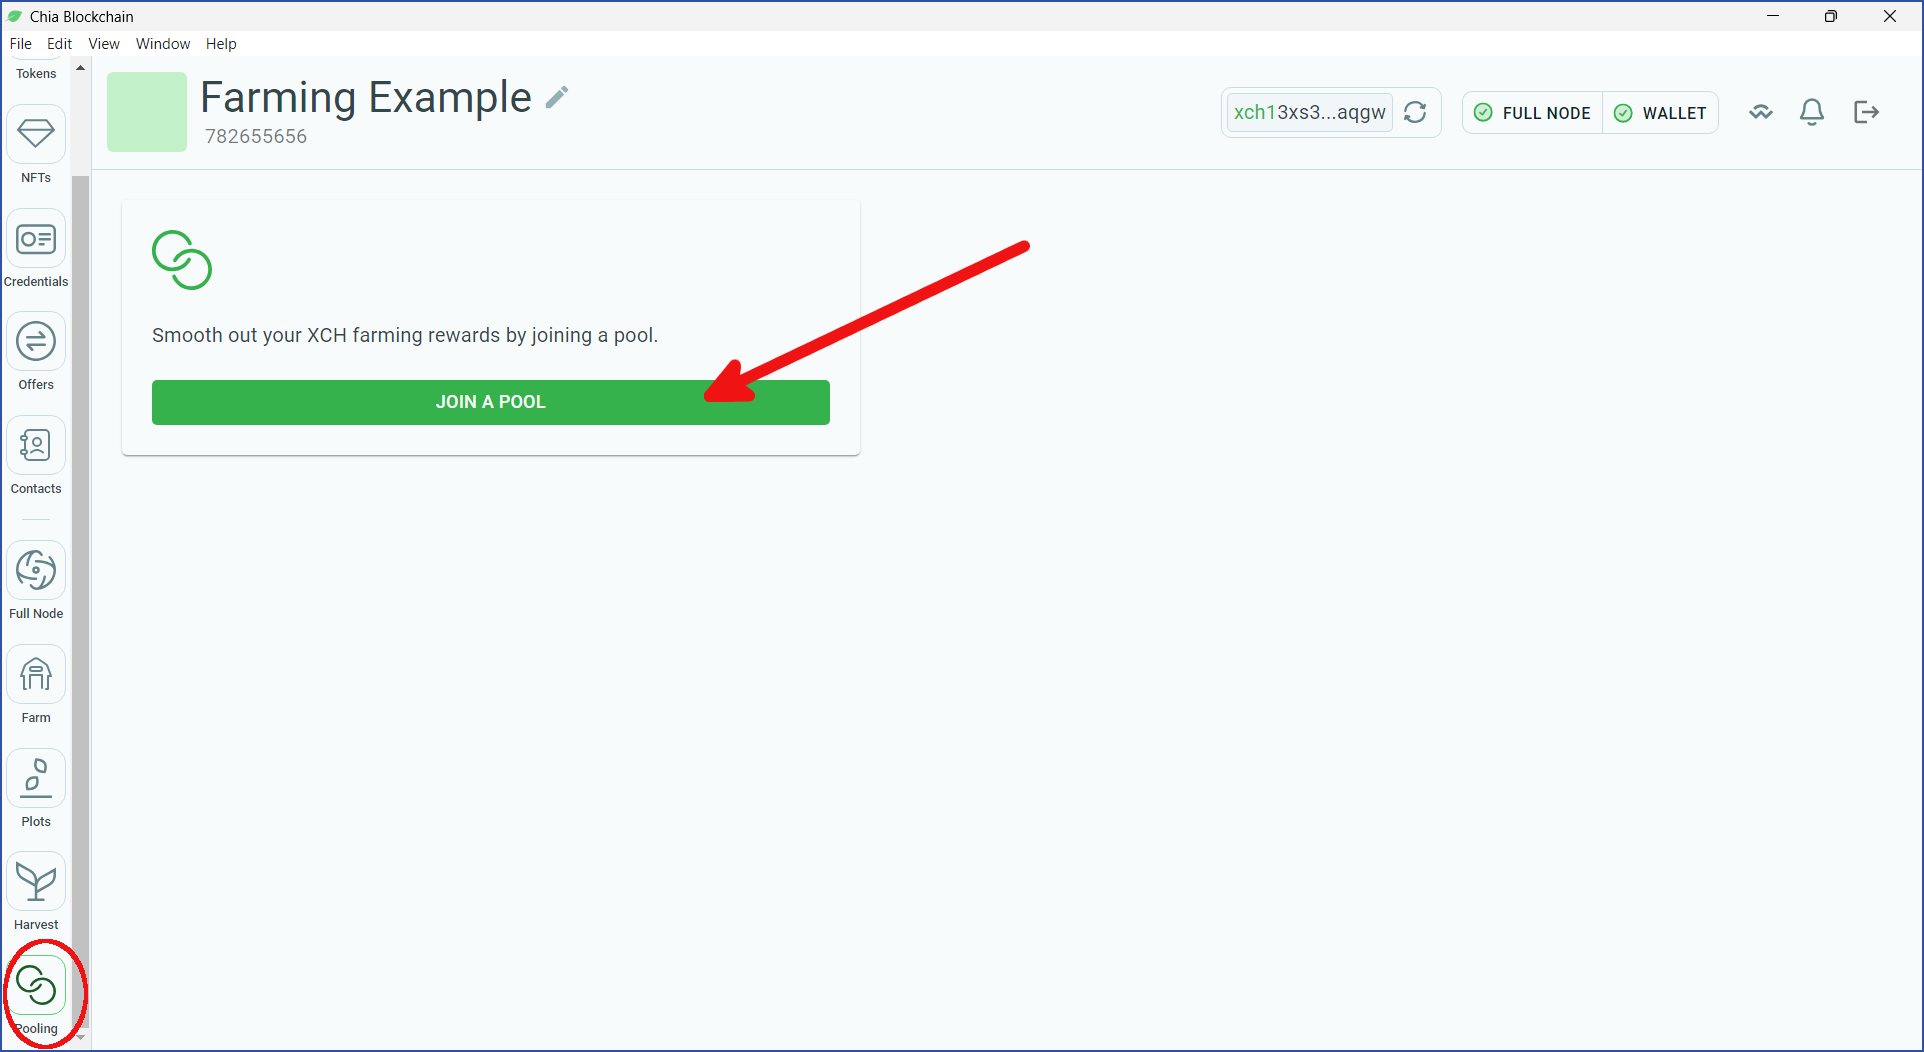
Open your wallet, click the Pooling icon in the lower-left corner, and click JOIN A POOL:
Select either option:
Self pool-- Select this if you are a solo farmer. Technically, you will be joining a "pool" where you are the only member.Connect to pool-- You will need to enter a valid pool URL. We will use OpenChia for this example, but there are many great pools to choose from. For a list of reputable pools, see Chialinks.com. (Chia Network Inc. does not run a pool, and is not affiliated with OpenChia or Chialinks).
Later, you can change pools, using the plot NFT you are about to create.
Creating a plot NFT requires an on-chain transaction that will cost one mojo. You are also recommended to enter a blockchain fee. Depending on how busy the network is, a one-mojo fee is typically enough to complete your transaction within a few minutes.

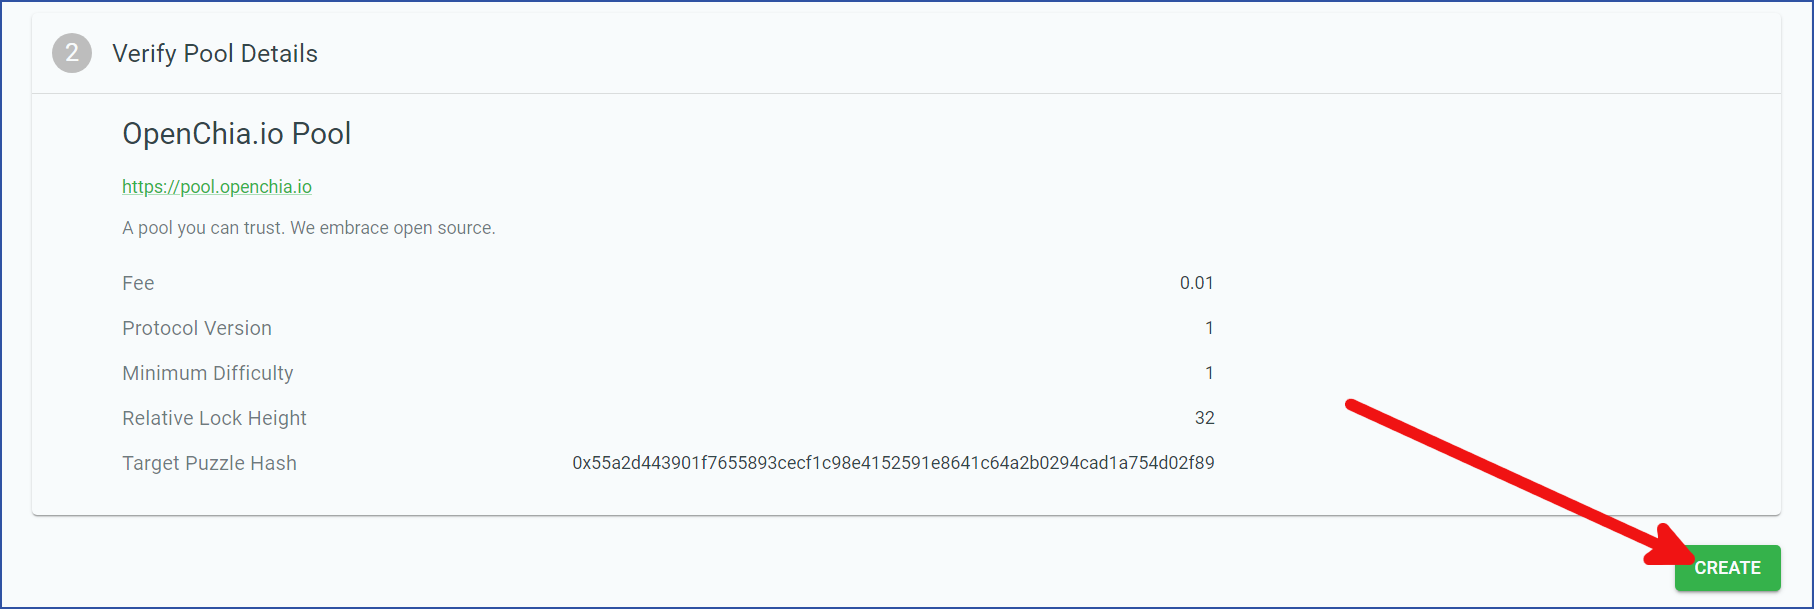
If you entered a valid pool URL, the details will pop up. For example, this pool has a fee of 1%. If everything looks acceptable, click CREATE:
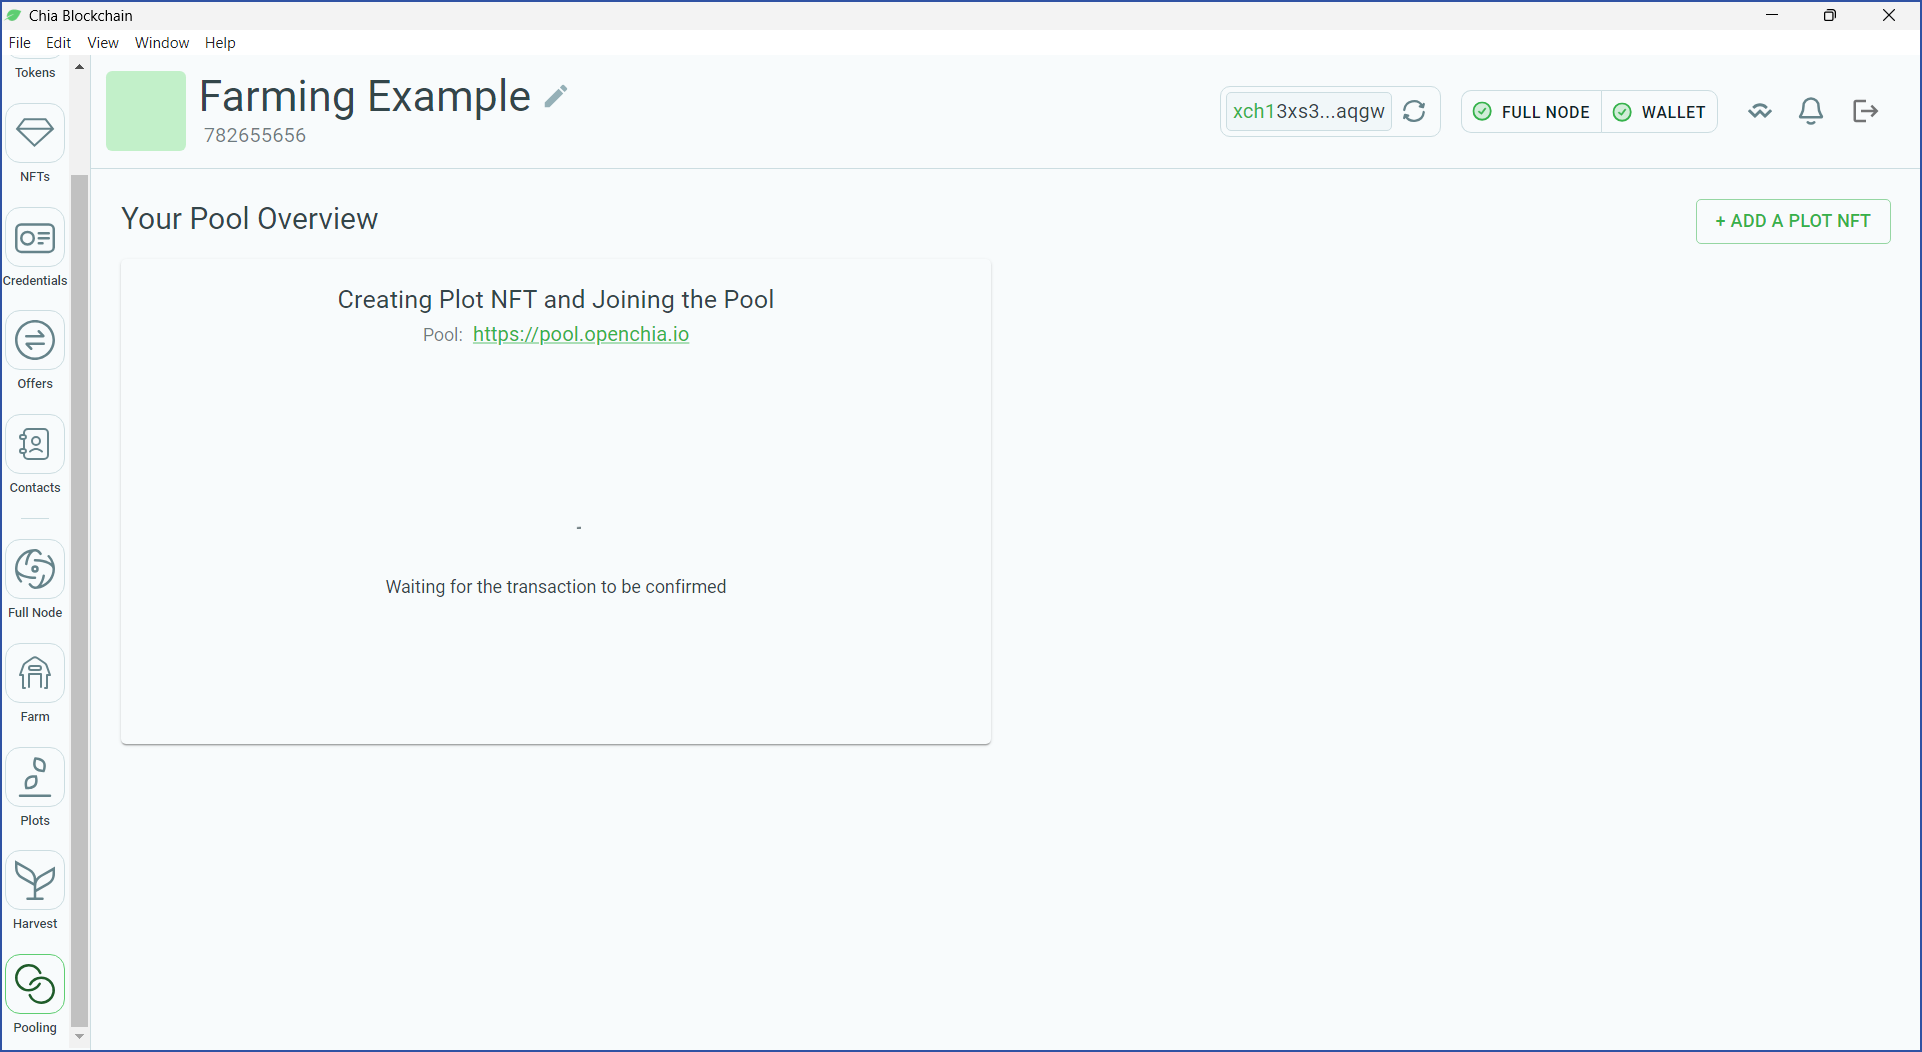
Your transaction will be pushed to the blockchain. While it is pending, a new screen will appear:
After the transaction has been finalized (typically 1-3 minutes), the details of your plot NFT will appear:
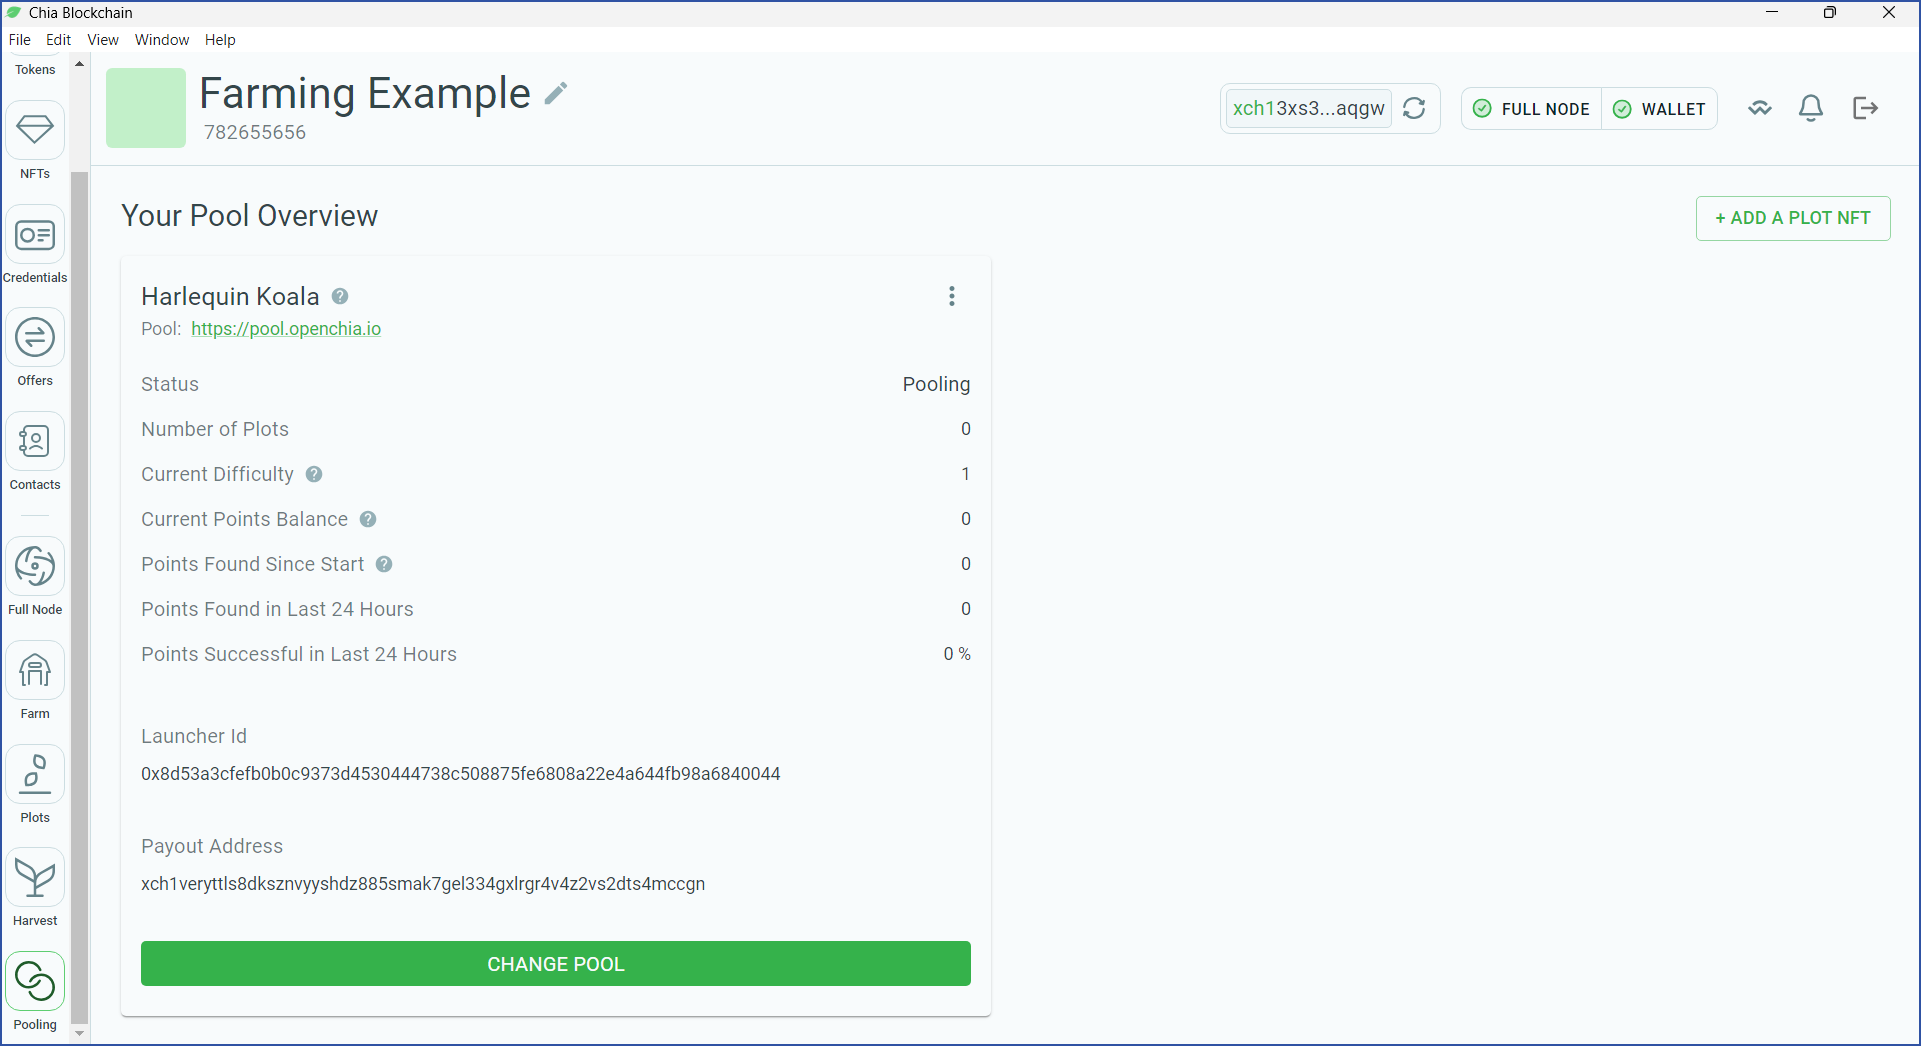
The pool contract address will be displayed automatically when creating a plot in the GUI.
CLI Plotting
If you are unsure which plotter to use, the Plotting Software page will help you to decide.
The plotters CLI documentation will guide you through using each of the plotters included with Chia. The basic commands to use are as follows:
BladeBit CUDA
Be sure to add --disk-128 if you have at least 128 GB of RAM, but less than 256 GB. See the plotters CLI documentation for more details.
As of Chia 2.1, plotting with at least 16 GB of RAM (but less than 128 GB) is still experimental. A few notes:
- The
--disk-16option has been disabled in the Chia 2.1.0 release. It is currently only available from the standalone version of BladeBit. - Plots created with this option on Linux with direct I/O disabled appear to work, but more testing is still needed.
- Plots created with this option on Windows are more likely to encounter issues.
- Be sure to check all plots created with this option, as they could be invalid even if the plotter appeared to succeed.
- Use
--disk-16at your own risk!
chia plotters bladebit cudaplot -d <destination dir> -f <farmer key> -p <pool key> -c <contract address> -n <number of plots> --compress <compression level>
BladeBit RAM
chia plotters bladebit ramplot -d <destination dir> -f <farmer key> -p <pool key> -c <contract address> -n <number of plots> --compress <compression level>
BladeBit Disk
chia plotters bladebit diskplot -t <temp dir> -d <destination dir> -f <farmer key> -p <pool key> -c <contract address> -n <number of plots> --compress 0
madMAx
chia plotters madmax -t <temp dir> -d <destination dir> -f <farmer key> -p <pool key> -c <contract address> -k <size> -n <number of plots>
ChiaPoS
chia plotters chiapos -t <temp dir> -d <destination dir> -f <farmer key> -p <pool key> -c <contract address> -k <size> -n <number of plots>
Regardless of which plotter you choose, it's a good idea to experiment with the optional parameters in order to optimize the plotting process for your hardware.
GUI Plotting
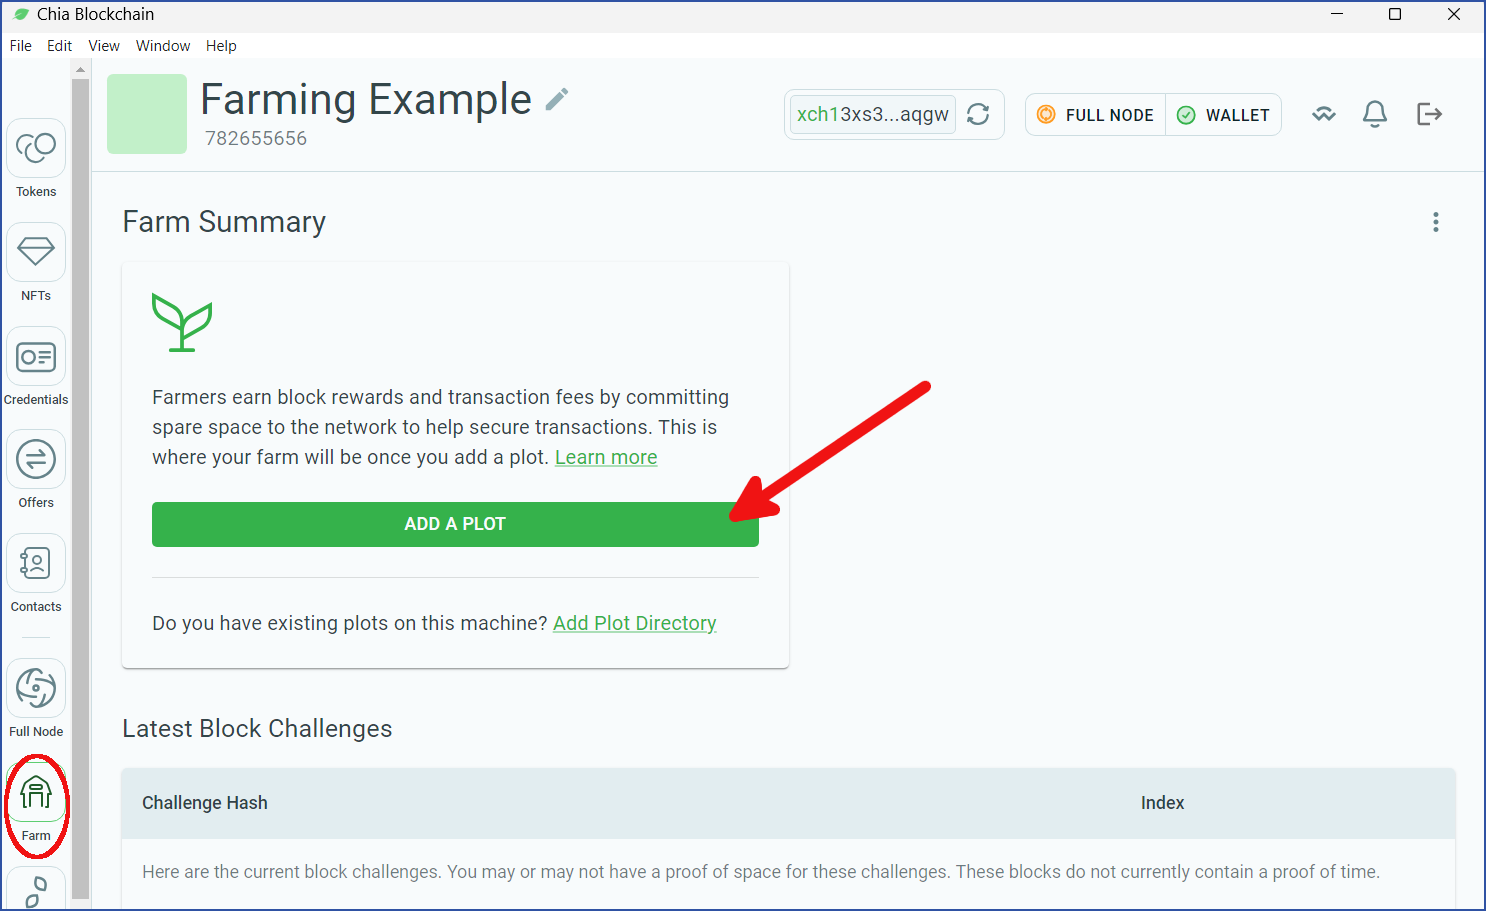
From the Chia application, click the Farm icon and click ADD A PLOT:
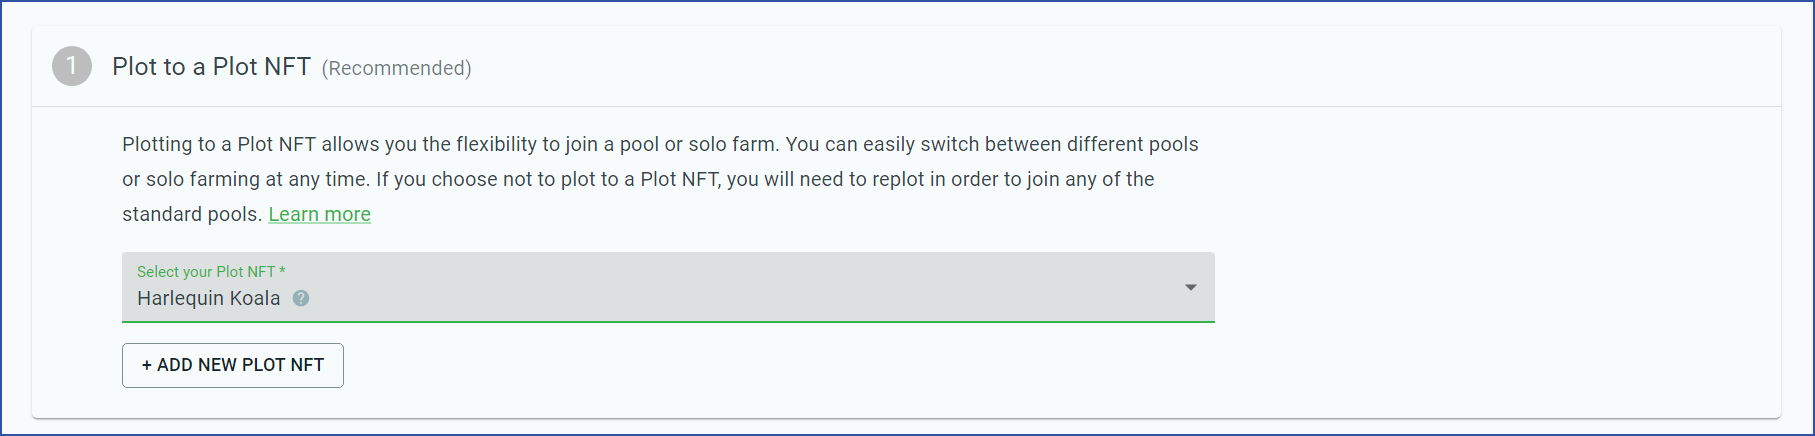
Your plot NFT will appear. In this example, it is called "Harlequin Koala". The plots you create will be associated with this NFT. It is important that you associate all of your plots to the same NFT because it will allow you to farm to a pool, as well as to change pools easily if desired. As long as your plot NFT shows up here, there is no need to change it:
Next, you will need to choose a plotter. If you are unsure which one to use, see the Plotting Software page for guidance.

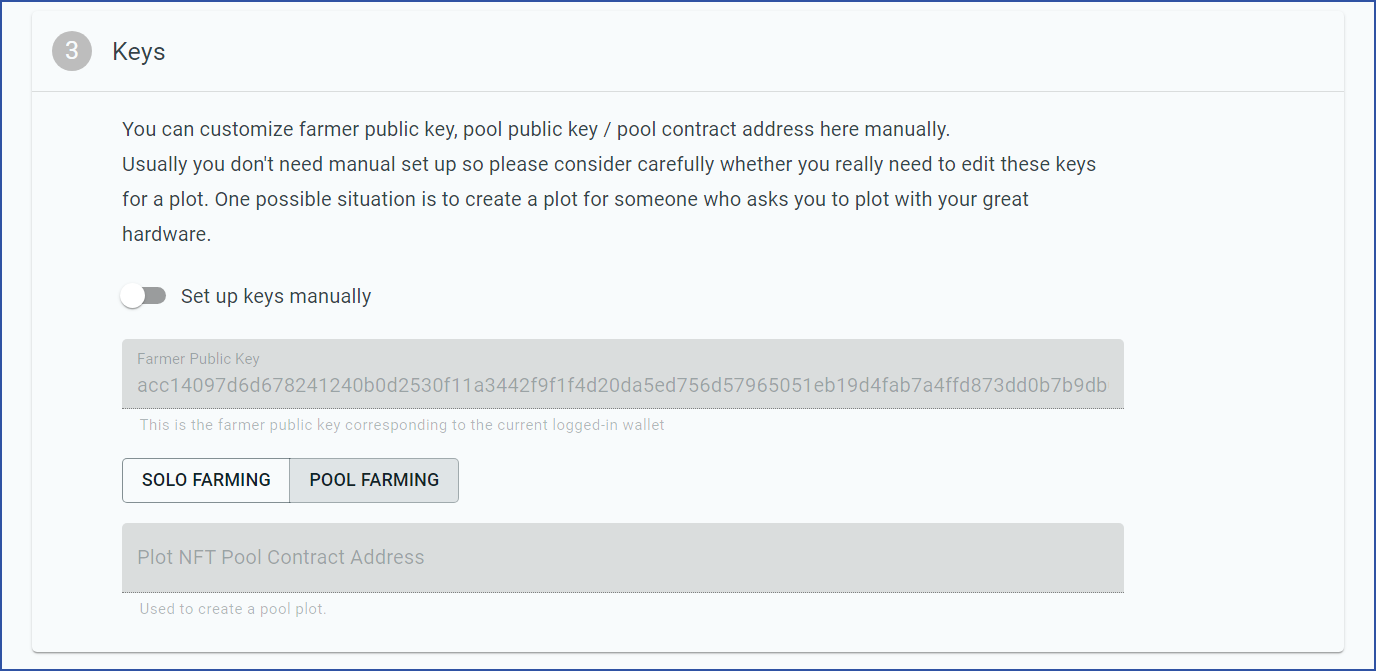
For the Keys section, you typically won't need to change anything (these are the keys you set up previously).
Next, you will need to choose a k value and a compression level. Certain plotters only allow one or the other of these options.

Depending on which plotter you chose, you may need to select a temporary storage location.
The final directory is where the plot will be copied after it has been created. Most farmers will choose to use an HDD as the final directory.

You will also need to choose how many plots to create.

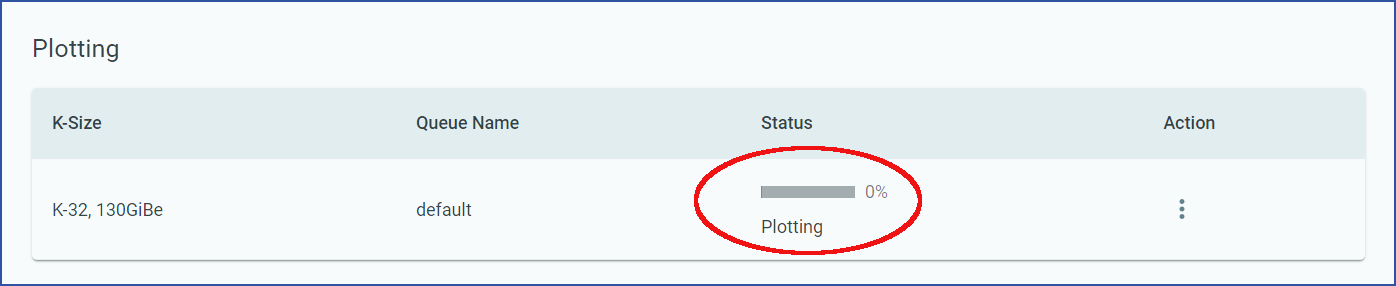
After you have gone through all of these settings, click CREATE. You will be taken to a progress panel:
Depending on your chosen plotter, there may be many other options you can experiment with. Some of these options can greatly streamline (or slow down) your plotting process, so it's good to try a few different settings.