CAT Creation Tutorial
The CAT standard allows you to create fungible tokens on the Chia blockchain. This step-by-step guide will go through creating your own CATs. For info on how CATs are built at the Chialisp level, see our CAT primitive page.
Alternatively, if you're looking for non-fungible tokens on Chia, check out our NFT guide.
Introduction
Welcome to the world of CATs! We're excited to have you here, and we can't wait to see the creative ideas you come up with.
This tutorial will help you jump right in and get started with issuing your own CATs. To minimize your risk of running into unexpected results, we recommend that you do following:
- Generate a new public/private key pair for each CAT you issue.
- Test thoroughly on testnet before issuing your CAT to mainnet.
For any questions regarding this tutorial, head over to the #chialisp channel on our Discord chatroom, where there are lots of friendly folks who can help you.
CAT Issuance Granularity
CAT denominations, as well as the rules behind issuance and melting, can take some getting used to. Here are a few things to keep in mind before you issue your CAT:
-
Most Chia wallets choose to display their value in XCH. However, this is a purely cosmetic choice because Chia's blockchain only knows about mojos. One XCH is equal to one trillion (1,000,000,000,000) mojos.
-
In a similar vein, Chia Network Inc. has made the design decision to map 1 CAT to 1000 mojos. This ratio will be the same for all CATs.
cautionTheoretically, it would be possible to set the CAT:mojo ratio to something other than 1:1000 for a specific CAT, but we strongly recommend against doing this. The Chia reference wallet will not support CATs with a ratio other than 1:1000. Additionally, if you created your own wallet with support for different ratios, users of this wallet would almost certainly be confused and accidentally spend too much or too little money, by multiple orders of magnitude. Please don't attempt this.
-
The melt value of a single token is 1000 mojos. This remains true regardless of the token's face value or its circulating supply.
-
A token's face value and its melt value are not necessarily correlated, let alone matched.
With one XCH, you can issue 1 billion CATs. The face value of these tokens could be zero, or multiple XCH, or anywhere in between. This value is decided by the market -- it's worth whatever someone is willing to pay for it. The value of the tokens has nothing to do with the underlying XCH, other than their 1000-mojo melt value.
These concepts are discussed in greater detail in our CAT primitive page.
Setting up your Chia Environment
Cat issuance comes in two phases. First, you will test your issuance on a testnet. Once ready, you will issue on mainnet.
For this tutorial, we'll use testnet11.
Ensure that you have Python 3.7 or later by running:
- Linux/MacOS --
python3 --version - Windows --
python --version
-
Install the latest version of Chia's reference wallet. For more info, see our installation guide.
-
Configure Chia to run on testnet11. For more info, see our testnet documentation.
-
Start Chia's reference wallet GUI. The command you use will depend on your OS, as well as whether you used a binary installer or installed from source. If you need help, see the installation guide.
When using the GUI, you have the option of running in Farming Mode or Wallet Mode. Both of these options will work for creating CATs. Farming Mode will be faster if you already have a synced full node, but this is not necessary for CAT issuance.
You can also run Chia's reference wallet from a command line if you prefer.
-
Add a new wallet if you have not already done so.
-
You will need to have a sufficient number of mojos for your CAT issuance and transaction fee(s). You can request some TXCH from the Testnet11 faucet.
-
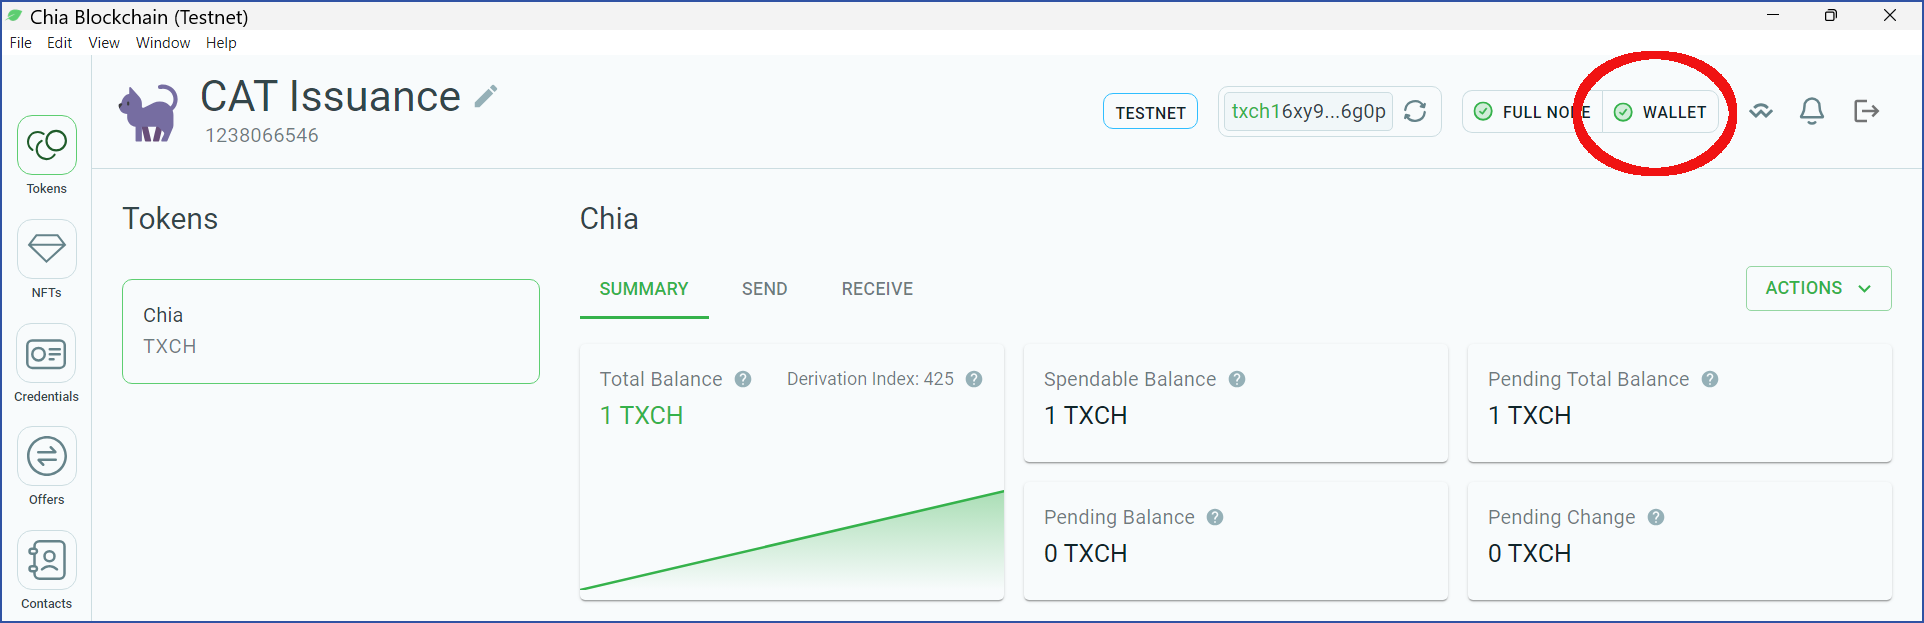
Before issuing a CAT, you will need to have a synced wallet, as demonstrated by the green checkmark inside the red circle in this image:
Once you have a synced wallet and some TXCH, you are ready to run the CAT admin tool.
CAT Admin Tool
Now we will set up the CAT admin tool, which will help you to issue your CATs:
- Linux/macOS
- Windows
Your Linux installation may not come with Python's development tools installed by default. To be sure that these tools are installed, run:
sudo apt-get install -y build-essential python3-dev
Next, clone the tool's GitHub repository:
git clone https://github.com/Chia-Network/CAT-admin-tool.git -b main --recurse-submodules
Change to the admin tool's directory:
cd CAT-admin-tool
Create and activate a virtual environment:
python3 -m venv venv
. ./venv/bin/activate
Install the prerequisites:
python3 -m pip install --upgrade pip setuptools wheel
Install the tool:
pip install .
Install chia dev tools:
pip install chia-dev-tools --no-deps
Install pytest:
pip install pytest
Next, clone the tool's GitHub repository:
git clone https://github.com/Chia-Network/CAT-admin-tool.git -b main --recurse-submodules
Change to the admin tool's directory:
cd CAT-admin-tool
Create and activate a virtual environment:
python -m venv venv
.\venv\Scripts\Activate.ps1
Install the prerequisites:
pip install --upgrade pip setuptools wheel
Install the tool:
pip install .
Install Chia dev tools:
pip install chia-dev-tools --no-deps
Install pytest:
pip install pytest
You might receive an error such as ERROR: Failed building wheel for CAT-admin-tool. This is likely safe to ignore. As long as you can run cats --help without errors, the tool has been installed properly.
Your environment should be all set, but let's make sure:
-
Run
cats --help. You should get a usage statement. -
Run
cdv --help. You should get another usage statement.
Your environment is now set up and you are ready to start issuing CATs!
Creating a Single Issuance CAT
To get started, you will create a single-issuance CAT. This is the default way to issue a CAT. It's also the simplest. It contains a TAIL that only allows the CAT to issue tokens once.
A TAIL is a Chialisp program that defines the rules for issuing and melting tokens. Learn more about the Token and Asset Issuance Limitations program.
Single issuance CATs can NOT be melted.
A CAT with a single-issuance TAIL will be useful for anyone who wants to create a token with a guaranteed fixed supply.
First, figure out how many tokens you want to issue. Because creating a single token takes 1,000 mojos, you will multiply your supply by 1,000 to figure out how much TXCH (or XCH on mainnet) is needed. For example, if you want to issue 1 million tokens, you'll need 1 billion mojos (1/1000 of a TXCH/XCH).
Take note of your Receive Address in the Chia GUI. (Alternatively, run chia wallet get_address from a terminal window.) You'll need this address for the next step.
After confirming you are within the admin tool directory, run:
cats --tail ./reference_tails/genesis_by_coin_id.clsp.hex --send-to <your receive address> --amount <mojos> -m <fee in mojos> --as-bytes --select-coin
We recommend that you include a fee with your transaction. This fee will ensure that your transaction is processed in front of any dust in the mempool. Whether you're running on testnet or mainnet, the recommended fee amount is 100 million mojos (-m 100000000). Even though you will run the cats command multiple times, the fee will only be applied once when the transaction is pushed to the network.
The --select-coin flag will choose a coin from your wallet for issuing your tokens. The final line of the output will be Name: <Coin ID>. You'll use the coin ID value in the next step.
Run the same command again, this time removing the --select-coin flag and adding a new flag, --curry <Coin ID>. It's very important to preface the coin ID with 0x here to make CLVM interpret the value as bytes and not a string. Here's the full command to run:
cats --tail ./reference_tails/genesis_by_coin_id.clsp.hex --send-to <your receive address> --amount <mojos> -m <fee in mojos> --as-bytes --curry 0x<Coin ID>`
If everything's good so far, this command will give the following output:
The transaction has been created, would you like to push it to the network? (Y/N)
Enter Y.
The output will be Asset ID: <Asset ID>. Copy the asset ID value, which you will need in the next step. Meanwhile, the transaction to create your CAT is being pushed to the blockchain.
Congratulations! You have issued your first CAT. You still need to tell your wallet about it, though.
Next, jump to Add a CAT to Your Wallet.
Creating a Multiple Issuance CAT
Next we'll create a CAT capable of issuing tokens multiple times. This CAT uses a delegated TAIL, which is much more flexible than the previous one. As long as you sign a puzzle hash that you specify, you can issue new tokens using whatever TAIL you want. This allows for features such as rebate offers and distributed issuing and retiring of tokens.
We'll set up this CAT to delegate the same TAIL we set up previously. What this means is that nobody else can issue new tokens until you allow it. Keep in mind that this is only one of many possible implementations of a delegated TAIL.
First, figure out how many tokens you want to issue. Because creating a single token takes 1,000 mojos, you will multiply your supply by 1,000 to figure out how much TXCH (or XCH on mainnet) is needed. For example, if you want to issue 1 million tokens, you'll need 1 billion mojos (1/1000 of a TXCH/XCH).
Multi-issuance CATs can be melted with a custom spend bundle as described here.
Just as with the Single Issuance CAT, we recommend that you include a fee with your transaction. This fee will ensure that your transaction is processed in front of any dust in the mempool. Whether you're running on testnet or mainnet, the recommended fee amount is 100 million mojos (-m 100000000). Even though you will run the cats command multiple times, the fee will only be applied once, when the transaction is pushed to the network.
Run chia wallet get_address from a terminal window to get a new receive address. You will use this address shortly.
Run chia keys show. Take note of your fingerprint and master public key.
After confirming you are within the admin tool directory, run:
cats --tail ./reference_tails/delegated_tail.clsp.hex --curry 0x<Master public key> --send-to <wallet address> -a <XCH mojos> -m <fee in XCH mojos> --as-bytes --select-coin
The --select-coin flag will choose a coin from your wallet to issue the CAT from. The final line of the output will be Name: <Coin ID>. You'll use the coin ID in the next step.
Now that you have a coin, you can create a full delegated TAIL. In our case, the TAIL it delegates will be of the single-issuance variety.
Run
cdv clsp curry ./reference_tails/genesis_by_coin_id.clsp.hex -a 0x<Coin ID>
Keep in mind the 0x before the coin ID is necessary. The result of this command will be a delegated puzzle, which you'll pass in as part of the solution to your main TAIL.
Run the same command again, with the additional --treehash flag. This will give you the treehash of the puzzle you just created:
cdv clsp curry ./reference_tails/genesis_by_coin_id.clsp.hex -a 0x<Coin ID> --treehash
Sign the treehash (you do not need 0x here) with the fingerprint you noted above by running this command:
chia keys sign -d <treehash> -f <Fingerprint> -t m -b
The last two flags are for the path and bytes. Make sure the resulting public key corresponds to the fingerprint you just used. Copy the signature to use in the next step.
Run the same cats command as above, but remove the --select-coin flag and add the --solution flag, passing in the delegated puzzle you just calculated. This must be surrounded by quotes and parenthesis and it must contain a solution, which we'll leave empty. Add the --signature flag as well:
cats --tail ./reference_tails/delegated_tail.clsp.hex --curry 0x<Master public key> --send-to <wallet address> -a <amount in mojos to issue> -m <fee in XCH mojos> --as-bytes --solution "(<delegated puzzle> ())" --signature <Signature>
This command will give the following output: The transaction has been created, would you like to push it to the network? (Y/N)
Enter Y.
The output will be Asset ID: <Asset ID>. Copy the asset ID, which you'll need in the next step. Meanwhile, the transaction to create your CAT is being pushed to the blockchain.
Because this CAT uses a delegated TAIL, you can issue more by re-doing step 1 from this section. After you run the “cdv rpc pushtx” command, the balance in your CAT wallet will increase according to the new issuance.
Add a CAT to Your Wallet
Switch to the Chia GUI. Within a few minutes, your balance should decrease by the number of mojos you spent issuing tokens (+ fees). It will not show up in your transaction history.
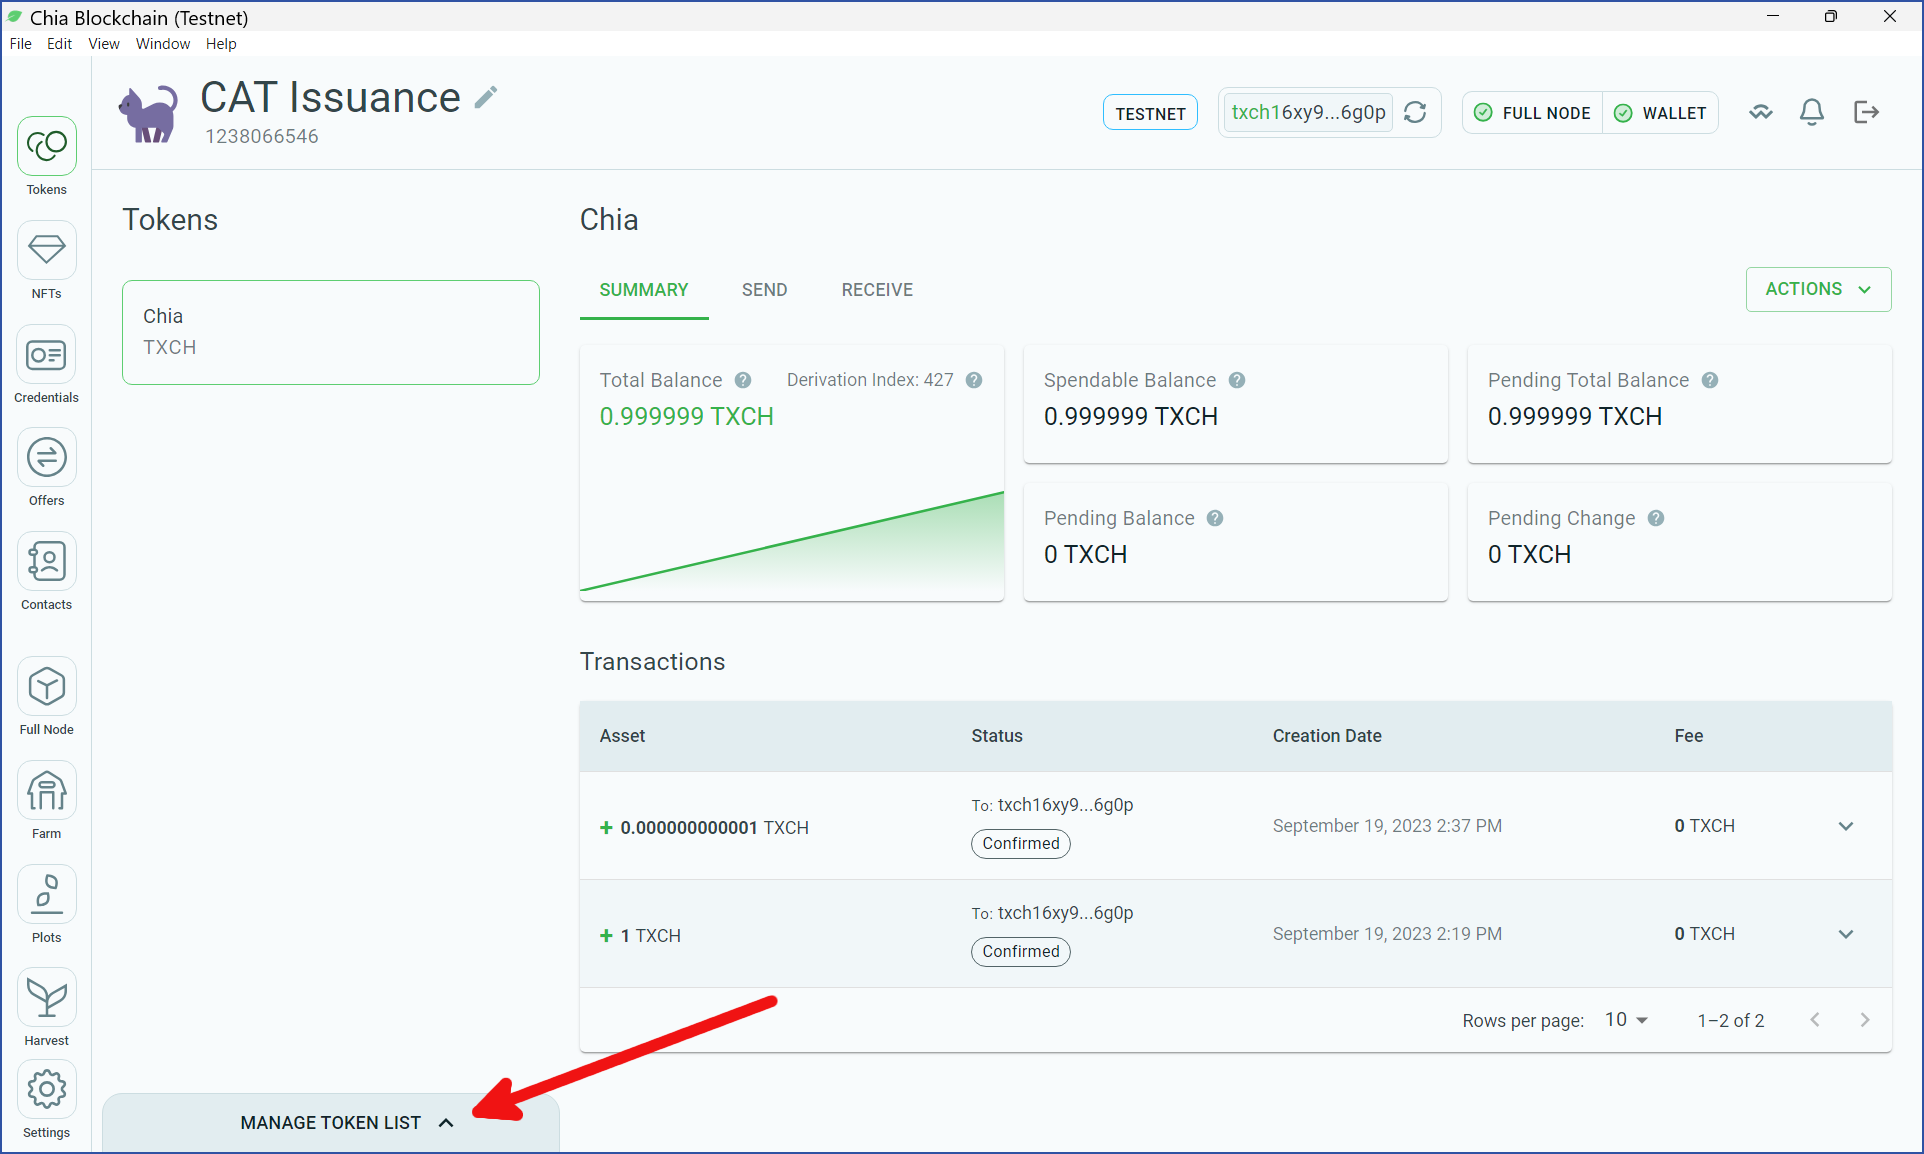
Now you can add a wallet ID for your new CAT. In the lower left corner, click MANAGE TOKEN LIST:
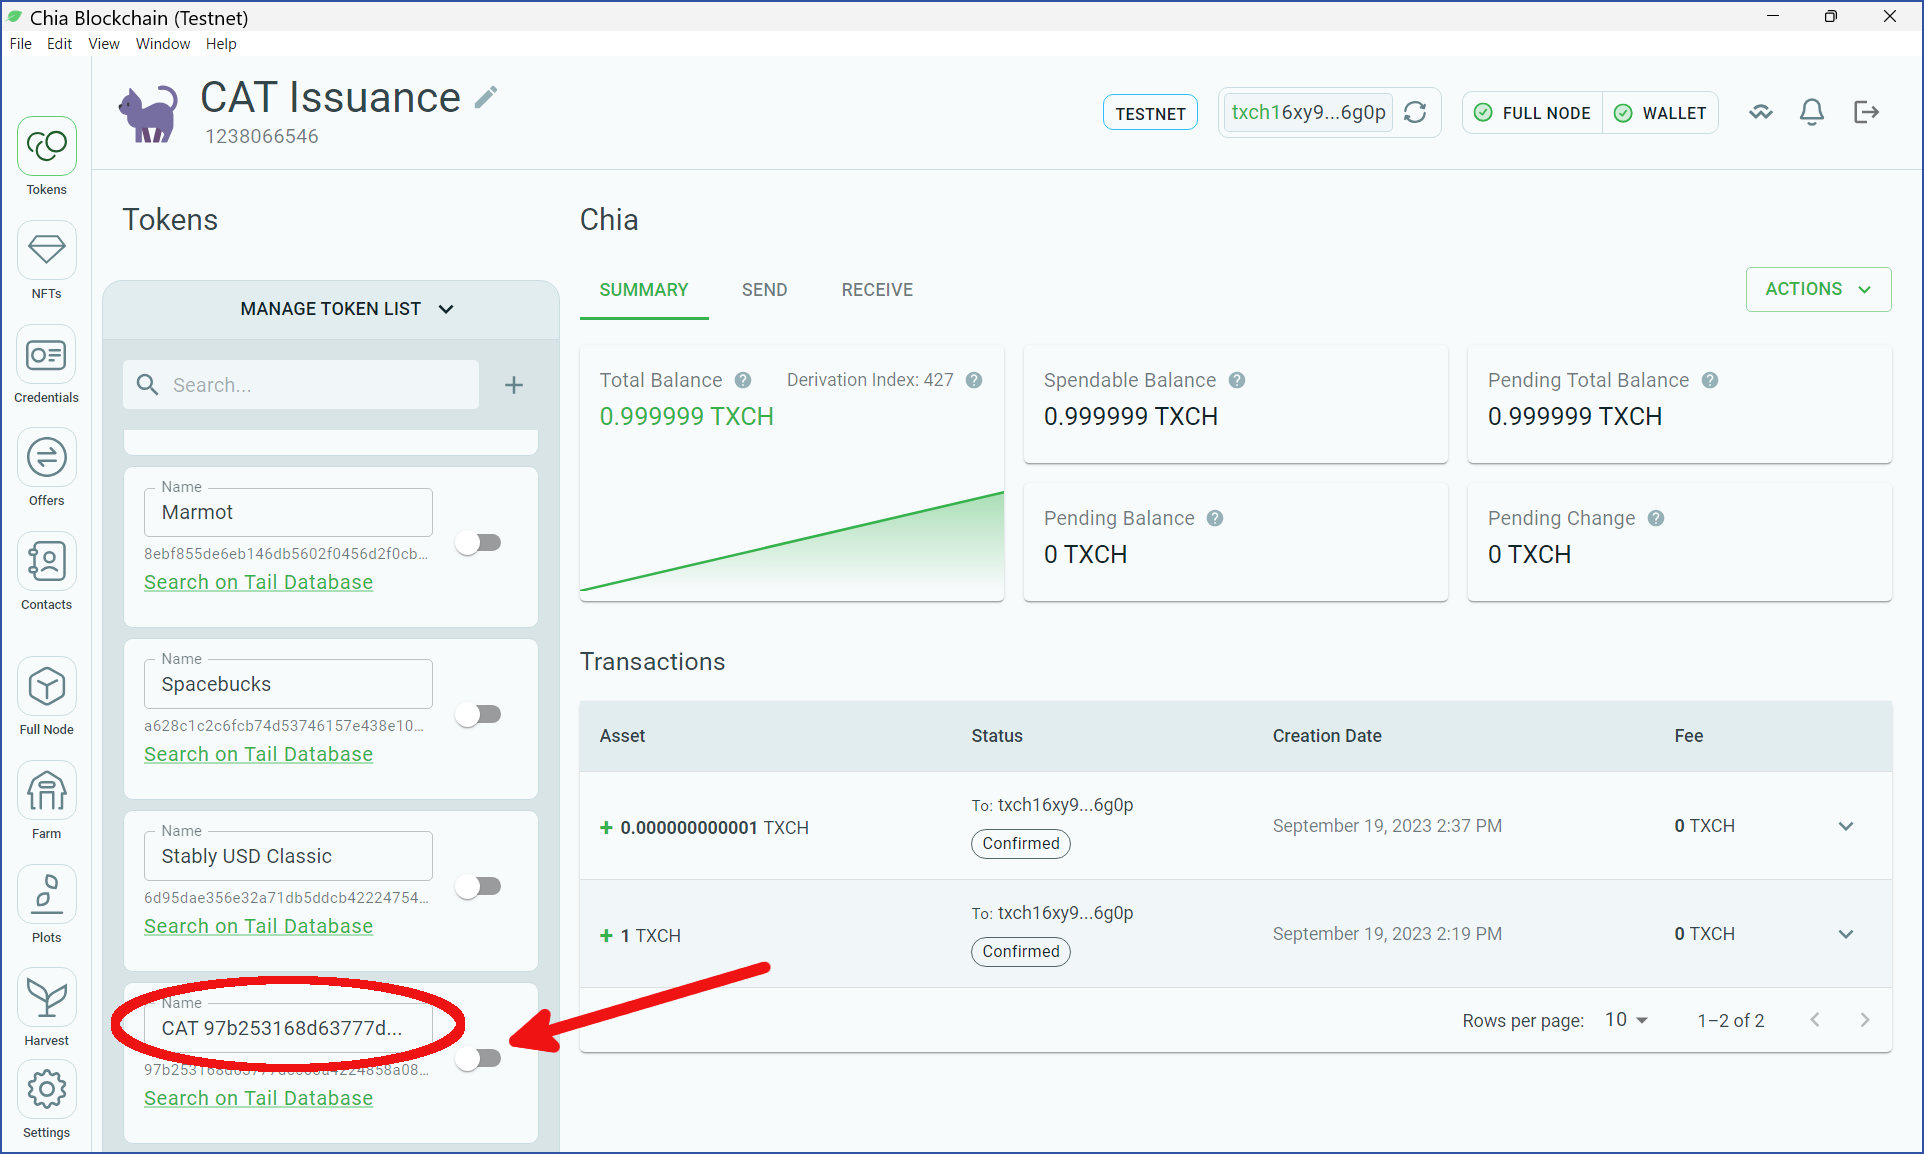
The first few tokens listed will be there by default (Marmot, Spacebucks, etc). At the end of the list, you should find your CAT's asset ID. Feel free to rename your CAT, and click the slider to add a new wallet with that CAT:
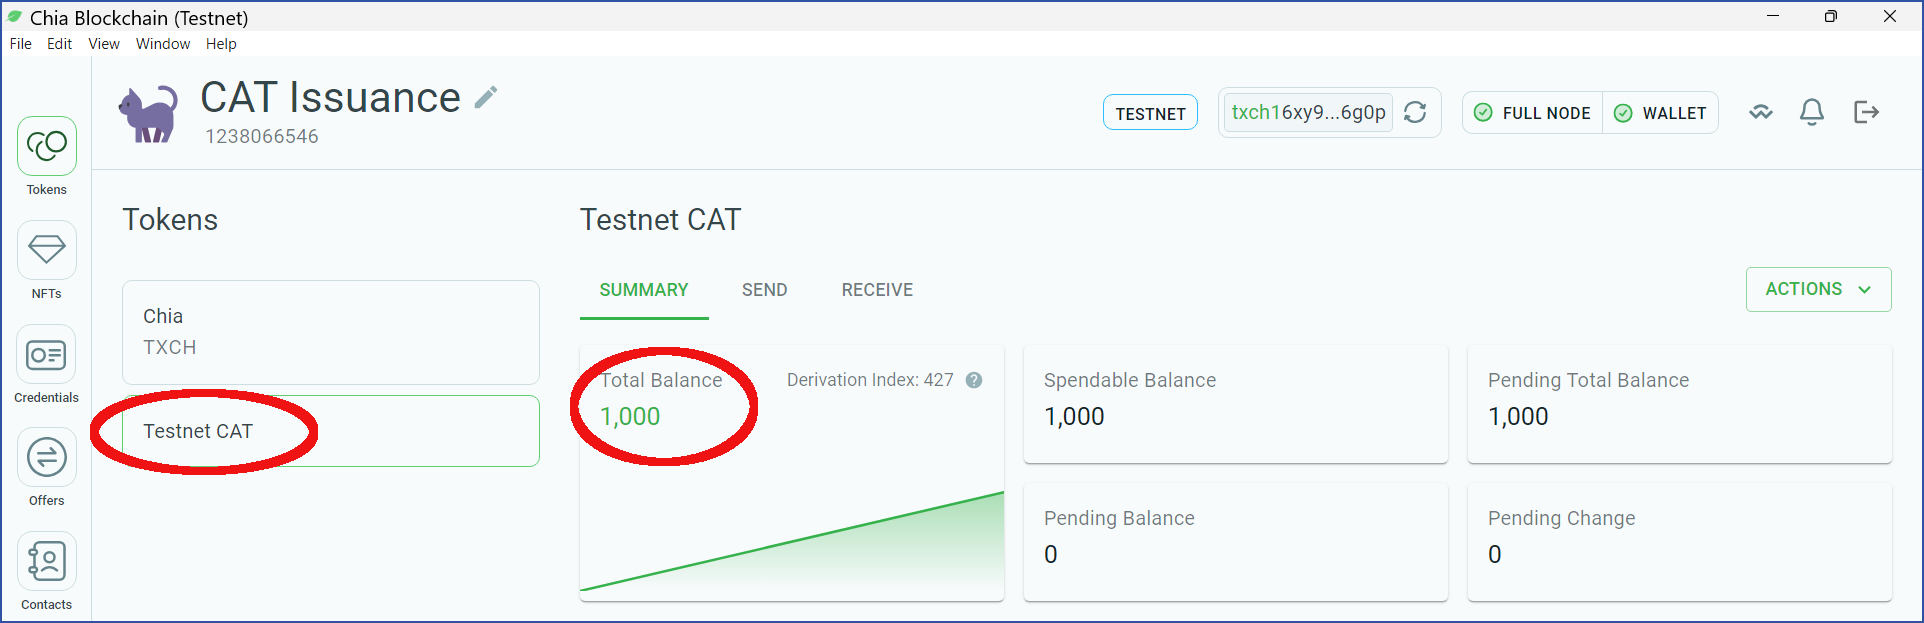
You will now see your token in your wallet with the full issued quantity. As a reminder, this should be the number of mojos spent divided by 1,000 (as each CAT token requires 1,000 mojos to issue).
You now have access to your CAT in the GUI. You can send and receive your new tokens just like you would with regular XCH.
Melting a CAT
When you spend one or more CAT coins, you provide an Extra Delta in the solution, which is essentially by how much the supply is changing. If it's positive, you're increasing the supply. And if it's negative, you're melting the CAT away.
When the Extra Delta is non-zero, you have to run the TAIL program, which describes the rules for when you are allowed to change the supply.
Single issuance CATs cannot be melted because the TAIL only allows being run if the coin has a specific parent. In other words, the supply can only be set once, and never modified thereafter. For multi issuance CATs, you need to sign with the issuance key in order to authorize the supply change, and therefore it does support melting.
You reveal and run the TAIL by outputting the following condition from the inner puzzle's spend:
(list CREATE_COIN () -113 <tail program> <tail solution>)
The documentation for this Extra Delta concept can be found here.
This is an example of melting a CAT from Rigidity's wallet SDK.
In this example, you start with a supply of 10000, use an extra delta of -3000, reveal the TAIL and output a new CAT with the remaining supply of 7000.
Here is another example of melting a CAT from Irulast's chia crypto utils.
Preparing for Mainnet
After you are comfortable with issuing your CAT on testnet, you may wish to move to mainnet. Please keep in mind that there are extra risks inherent to publishing code on a public blockchain. If your seed phrase is ever exposed, your funds could be stolen. If you created a custom TAIL, there is a possiblity of funds being bricked. Proceed with caution.
That said, issuing a CAT to mainnet isn't very different from issuing one to testnet. You can continue to use the light wallet, or a full node if desired.
When you are ready to issue your CAT to mainnet, the first step is to switch to mainnet.
chia configure -t false
The second step is to generate a new key pair and store the mnemonic in a secure manner. You can generate your key by clicking Add Wallet and Create New from the Wallet Keys login screen of the GUI. This will work in the same manner as earlier for our testnet CAT.
We recommend the new keypair being used exclusively for the CAT ownership.
The key pair you are about to use will control the issuing and retirement of these tokens forever. If the private key were ever compromised, an attacker could issue new tokens and melt any they owned into regular XCH.
The only way to nullify an attack would be to keep track of illegitimate issuances (luckily all of this is fully visible on the public ledger), issue a new CAT, and then offer an exchange of legitimate old CATs for the new CAT type.
This would be a complex and time-consuming process that would likely result in people being sold counterfeit CATs at some point. It's very important to keep your private key secret.
You can generate keys from the CLI as well.
Use chia keys show to see your available keys. Take note of their fingerprint as you will want to not use an existing key.
Generate a key with chia keys generate, followed by chia keys show --show-mnemonic-seed to reveal the 24 words.
Copy your new key pair's mnemonic seed (24 secret words) to a secure offline location. These 24 words are all you'll need to restore your wallet in the future.
Finally, you can go through the same process to create a CAT now using real XCH on mainnet.
Conclusion
Congratulations! You've created your first CAT. What now?
Well, hopefully you can share your CAT with the world and get some traction. In the meantime, you can learn more about the Single Issuance TAIL and Multi Issuance TAIL.
This guide was for fungible tokens. Now you can learn about non-fungible tokens.